ESP8266 Thing Firmware Flashing via MBED
The ESP8266 is a pretty popular chip to add wifi communication to embedded projects. However, the previous one was not fully broken out and thus hindered functionality. This is an aggregation of information to be able to flash the newer ESP8266 Thing and use it in a similar fashion as the older ESP8266 breakout chip. While there is a nice Arduino plugins, a NodeMCU firmware for running Lua scripts, and MicroPython support, this tutorial will demonstrate how to flash the ESP8266 with the AT command firmware through the MBED and allow the MBED to use the ESP8266 Thing as a server. You can use this tutorial to flash any firmware you desire.
Sources
Sources are put first because this tutorial will be very similar to them, with information pulled from everywhere to make one comprehensive guide. If you want to see them yourself, you'll find them below. Special thanks go out to Austin mbed, Jim Hamblen, Sparkfun, and a bunch of random tutorials online.
Motivation
You can easily flash any ESP8266 chip with an FTDI cable, but you can easily save some beer money and flash it via the MBED. If you have your hands on an FTDI cable, I'd recommend you use that. It makes your life much easier. However, this will work in a pinch.
Before Starting...
You'll want to visit a couple places before starting:
- EspruinoDocs
- You can download the latest firmware here. In my example, I downloaded the v0.25.0.0 firmware.
- esptool
- This is used to flash the firmware onto the ESP8266. Follow the installation instructions to get access to the esptool command in python.
- An easier way to install is with pip:
pip install pyserial
Flashing Firmware Update (or Downgrade)
MBED board as a serial passthrough
This code allows for your computer to talk to the mbed and vice versa, you'll want to compile and put this on your mbed before running the esptool python script.
Import programSerialPassthrough_LPC1768
Serial pass through program - version for mbed LPC1768 pins 28,27 9600 baud
Wire Up!
Pull DTR low to ground so it will boot into bootloader mode (as per spec). You can find more information in the jumpers section. The rest of the connections are pretty self-explanatory. Make sure you connect both things into their power sources, and switch the ESP8266 Thing on.
| MBED | ESP8266 Thing |
|---|---|
| p28 | TXO |
| p27 | RXI |
| GND | DTR |
| GND | GND |
| Vout | 3V3 |

Flash
After your MBED is plugged in, you can find it's port pretty easily. Good information on how to do that is found in the esptool.py wiki here. I'm on OSX, and mine was located at /dev/tty.usbmodem1412.
Navigate to the directory of esptool.py and run this command:
./esptool.py -p [MBED port] -b 9600 write_flash 0x00000 [Firmware Location]
For me, that would look like this:
./esptool.py -p /dev/tty.usbmodem1412 -b 9600 write_flash 0x00000 /Downloads/v0.9.5.2\ AT\ Firmware.bin
This will take a couple minutes to run. If you are running into errors, fully unplug the MBED and re-power the ESP8266 Thing and try again. Make sure your ports are correct.
Run Example Code
Re-wire
Take DTR out of bootloader mode by removing it's connection to GND. It should look like this:
| MBED | ESP8266 Thing |
|---|---|
| p28 | TXO |
| p27 | RXI |
| GND | GND |
| Vout | 3V3 |

Make sure you reset everything before continuing just as a safe measure.
Run Example Code
You should be good to go! Just run these two programs in serial and copy the IP address into your browser of choice. Note that for the first program, you have to change line #12 and #13 to the SSID and password of your wireless internet.
Import programESP8266-configuration-mbed-LPC1768
Setup and test the ESP8266 Wi Fi SOC from Sparkfun. Sets SSID and PASSWORD and prints status messages. For use on mbed LPC1768. Also reports IP and MAC address. See https://developer.mbed.org/users/4180_1/notebook/using-the-esp8266-with-the-mbed-lpc1768/
Import programESP8266-WEB-Mbed-LPC1768-Controller
For ESP8266 Wi Fi SOC from Sparkfun on the mbed LPC1768. Sets up a web page server that can control a few mbed pins. Nice IoT demo. Need to configure Wi Fi SSID and PASSWORD first with another program first (one time only). See https://developer.mbed.org/users/4180_1/notebook/using-the-esp8266-with-the-mbed-lpc1768/ for more info.
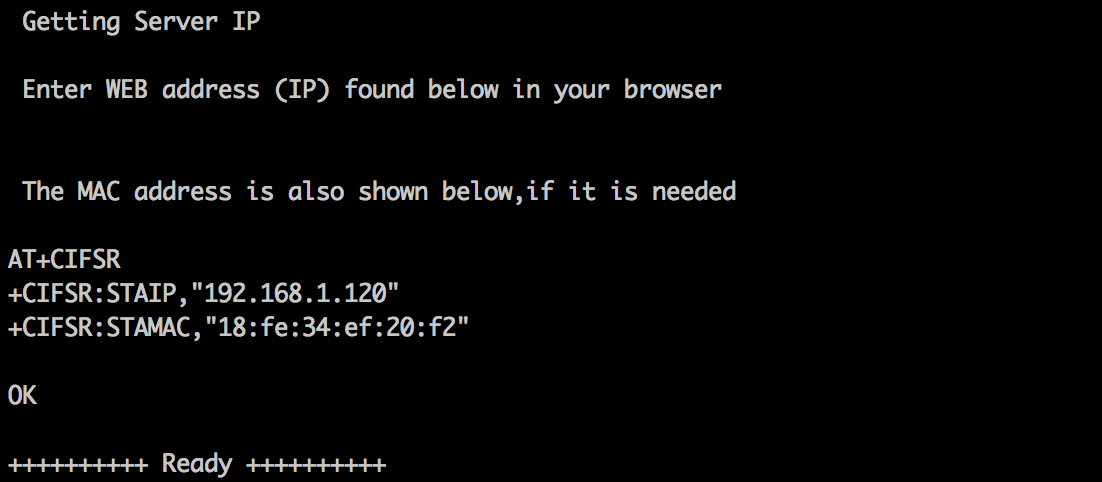
When running both programs use SerialPC to get all the useful information on how your ESP8266 is set up. The tail end of my output looks like this:

And going to that IP address (while my laptop is connected to the same wireless internet):

1 comment on ESP8266 Thing Firmware Flashing via MBED:
Please log in to post comments.


Hi! You mentioned in your description "You can use this tutorial to flash any firmware you desire.", do you think your way can be tried as well with Huzzah ESP8266?
By the way, great instructions!
Cheers!