TPA2005D1 Class D Audio Amp

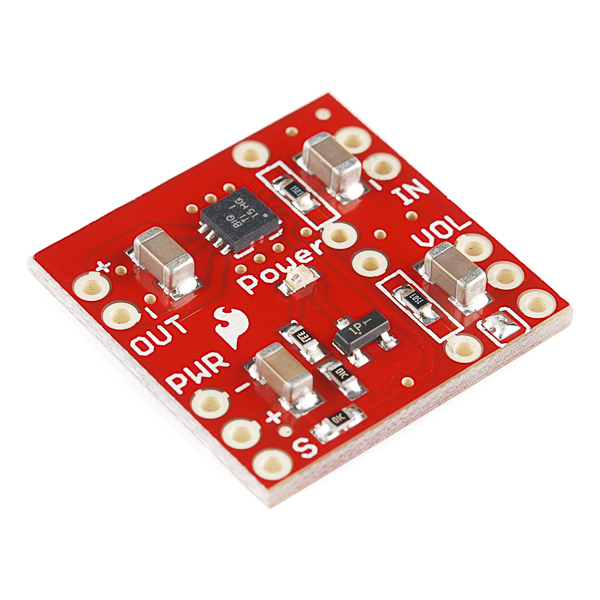
TPA2005D1 breakout board from Sparkfun
The TI TPA2005D1 is a 1.4-W mono filter-free class D audio power amplifier with a differential input. Class D amplifiers use PWM for power efficiency. This one uses a 250 kHz PWM output with an H-bridge output driver to drive a small speaker. It has been used in cellphones and tablets. The breakout board has space for an optional volume control potentiometer and an optional power shutdown pin that can be used to turn it off. There are additional instructions available for soldering on the volume pot (this also requires solder wicking a default volume solder bridge jumper between the "[ ]" silkscreen mark on the lower right corner of the board), changing the gain resistors, or using the power off feature. This demo will use it as is, without additional modifications.
Class D is probably the best option for new designs. It is more power efficient and does not need as many large external capacitors as the linear options such as the LM386 audio amp IC require. Pricing for the surface mount TPA2005D1 part is also less than the LM386. Any PWM output pin or a D/A output pin can be used to provide the audio input from the mbed.
Hello Audio World Demo
Just about any speaker can be used. Wires could be soldered on a small speaker that could be plugged into a breadboard.

Small Sparkfun Speaker
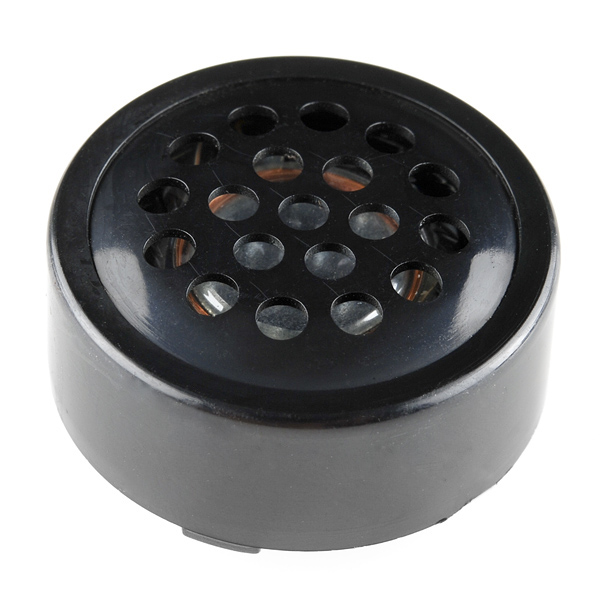
Sparkfun also has a handy speaker that with plug into a breadboard, but be careful not to overdrive it. The volume control pot might be needed, or the input audio level could be reduced in hardware or software. On small speakers like this, use the 3.3V and not the 5V power supply for the amp power pin. Sparkfun also has an audio jack breakout board that could be used for earphones or headphones.

Small breadboard friendly speaker from Sparkfun
Warning
The small Sparkfun PCB speaker works great in a breadboard and is very handy, but when removing it from a breadboard be careful to pry the bottom up first with a something flat like a screwdriver. If you pull it out hard using the top black metal speaker cover, the PCB on the back cover can pull off and break the tiny speaker wires soldered to the pins inside the back cover.
Wiring
| mbed | TPA2005D1 | Speaker | |
|---|---|---|---|
| gnd | pwr - (gnd), in - | ||
| Vout (3.3V) or 5V | pwr + | ||
| p26 (PWM) | in + | ||
| out + | + | ||
| out - | - | ||
| Any DigitalOut px(optional) | S (low for shutdown) |
Note: An external power supply may be required for some sounds & speaker setups or if other devices are added to mbed. If the red LED goes out or sound stops, it may be the limited current available on the USB power supply.
If an application needs to play a sound or a long sequence of notes (i.e., a song) and continue to execute other code, a timer interrupt can be used so that the call returns immediately and the song continues to play using timer interrupts while other code can execute in main. The new SongPlayer class in this example program sets up the timer with the Timeout API and plays a song passed to it in two arrays. The note array contains the frequency and a duration array that contains the duration of each note. The example uses p26 for the speaker PWM output. The song plays while the LED flashes back in main. The class in SongPlayer.h sets up the timer interrupt for the next note's duration and sends the new note frequency data to the PWM hardware. A note with a 0 duration ends the song. If long songs are used, making the arrays "const" will save RAM by putting the data in flash.
When the board has power, the red led will be on. If the amp is placed in standby mode by pulling the S pin low with a DigitalOut pin, the led turns off. The song demo plays once. Hit reset to play again.
#include "mbed.h"
#include "SongPlayer.h"

// Song test program - plays a song using PWM and timer interrupts
// for documentation see http://mbed.org/users/4180_1/notebook/using-a-speaker-for-audio-output/
// can be used to play a song, if you have the notes and durations
// for musical note frequencies see http://en.wikipedia.org/wiki/Piano_key_frequencies

//Set up notes and durations for sample song to play
// A 0.0 duration note at end terminates song play
float note[18]= {1568.0,1396.9,1244.5,1244.5,1396.9,1568.0,1568.0,1568.0,1396.9,
                 1244.5,1396.9,1568.0,1396.9,1244.5,1174.7,1244.5,1244.5, 0.0
                };
float duration[18]= {0.48,0.24,0.72,0.48,0.24,0.48,0.24,0.24,0.24,
                     0.24,0.24,0.24,0.24,0.48,0.24,0.48,0.48, 0.0
                    };

DigitalOut led1(LED1);
int main()
{
// setup instance of new SongPlayer class, mySpeaker using pin 26
// the pin must be a PWM output pin
    SongPlayer mySpeaker(p26);
// Start song and return once playing starts
    mySpeaker.PlaySong(note,duration);
    // loops forever while song continues to play to end using interrupts
    while(1) {
        led1 = !led1;
        wait(.1);
    }
}
Import programsong_demo_PWM
Plays a song using PWM and timer interrupts. Returns once song starts.
When PWM is used for audio output, the PWM clock is typically around 10 times the highest frequency in the audio output.
Warning
This code example increases the PWM clock frequency for audio output use. This can interfere with other devices (i.e., RC servos) using PWM outputs that expect slower clocks. Most mbed platforms have only one PWM clock for all PWM outputs. If this is an issue, the other code can be modified or the D/A output pin can be used instead, but a significantly faster update rate is required when using the D/A for audio output of simple tones instead of PWM. The mbed cookbook also has some software PWM options.
There is also an mbed wavefile player audio code example (along with more audio examples) that reads *.wav files from the SD card and uses the D/A output pin or it can be modified to use a PWM output. A USB flash drive can also be used, but the mbed's internal flash drive is a bit too slow for audio files.
For simple devices that require only new a few seconds of audio, it is possible to use on-chip flash memory instead of a *.wav file on an uSD card for audio playback. See Using Flash to Play Audio Clips for examples and tools to use.
Adding a Volume Control Pot
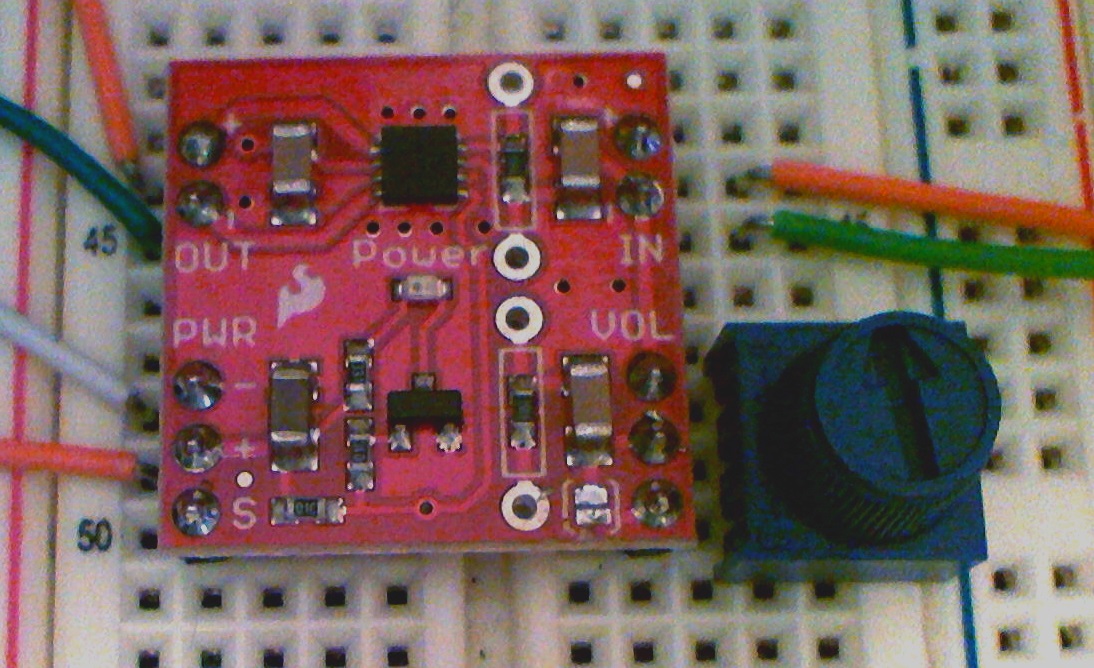
Here is a handy trick to add the Sparkfun breadboard friendly 10K pot as a volume control. Unsolder the solder jumper on the lower right. It is between the "[ = ]" marks. Without the jumper, it still seems to operate at maximum volume, but it needs to be removed to enable volume control. Position the breakout board to the left so that only on column of pins is open on the left side (leaving three on the right side). If three header pins are soldered into the volume control pins, the pot can just be plugged into the breadboard on the right side for the three volume control connections as seen in the image below. No jumper wires are needed.

Easy way to add a Volume Control Pot
Adafruit also has some other Class D audio amp breakout boards.
Please log in to post comments.
