 Nicolas Nackel
Small Internet Protocol Stack using a standard serial port.
Configuring Windows Dial Up Networking
A step-by-step guide to creating a Dial-up Networking Adapter using PPP-Blinky.
This guide was made using Windows 8 - if you use a different version of Windows, your steps may look different.
A. Use Device Manager to configure your mbed serial port
1. Ensure your mbed board has the latest firmware installed - check with your board vendor.
2. Ensure your PC has the latest USB driver installed for your mbed board - check with your board vendor.
3. Use Device Manager and check under Ports to find your mbed board's USB virtual serial port.
In the example below, the mbed LPC1768 board registered as "mbed Serial Port (COM3)"

4. Double-click on the mbed serial port to open its properties window, and set the baud rate and parameters as follows:

4a. After configuring your board, unplug the USB cable from your board, and then replug the cable.
This ensures that your new configuration is properly loaded by the USB driver.
B. Use Control Panel to create a new modem
(If you are into swag you may want to look at this before creating your modem:
/users/nixnax/code/PPP-Blinky/wiki/Windows-Dial-Up-Networking
5. Using Control Panel, find the Phone and Modem entry, and click on it.

6. This will open the Phone and Modem dialog. Go to the Modems tab and click on Add

7. In the Add Hardware Wizard, select Don't detect my modem. I will select it from a list , then click Next (see below)

8. In the Install New Modem dialog, choose Communication cable between two computers under Standard Modem Types, then click Next.

9. In the Install New Modem dialog, click on the COM port of your mbed board. (COM3 in my example), then click Next.

10. After a while you should see this:

C. Use Device Manager to configure your new modem
11. In Device Manager you will now have a new category: Modems. Open the category and double-click on Communications cable between two computers to configure your new "modem". Be patient, this window may take a long time to open

12. Under the Modem tab, set the speed to 115200 bits per second:

13. Under the Advanced tab, choose Change Default Preferences:

14. In the new dialog, change Flow control to None, then click OK:

15. Click OK once more to save the settings, then close the Device Manager window.
D. Use Device Manager to verify all the settings
16. Again, unplug your mbed board USB cable, then replug it, then Use Device Manager a third time to double-check all the above settings for both your COM port and your modem.
E. Create a new network adapter using Control Panel
17a. Unplug your mbed board USB cable.
17. Use Control Panel - Network and Sharing Center and click on Set up a new connection or network:

18 . Choose Connect to the internet:

19. Choose Set up a new connection anyway

20. Choose Dial-Up:

21. Enter any phone number, for example 123, then click Connect

22. After a few seconds of trying, the connection will fail. Click Set up the connection anyway:
F. Configure your new network adapter using Control Panel
23. Using Control Panel - Network and Sharing Center, click on Change adapter settings:

24. Click on Dial-up Connection, then choose Rename this connection:

25. Rename Dial-up connection to PPP-Blinky and press enter:

26. Right-click on PPP-Blinky, and then select Cancel as default connection:

27. Right-click on PPP-Blinky again, and select Properties. When you see the dialog below, click on Configure:

28. Set the modem baud rate to 115200, and disable all other options:

29. Under the Options tab, select Display progress while connecting and set Idle time before hanging up to never:

30. Under the Options tab, PPP Settings, disable all 3 options and click OK:

31. Clicking on the Security tab initially gives me an error, but click OK and continue:

32. Click on the Networking tab and disable Internet Protocol Version 6 and Client for Microsoft Networks. Then, click on Internet Protocol Version 4 and click on Properties:

33. Select Use the following IP address and type in 172.10.10.1, then click on Advanced:

34. Under the IP Settings tag, uncheck Use default gateway on remote network and Use IP header compression:

35. Under the WINS tab, ensure that Disable Netbios over TCP/IP is checked, and click OK three times to complete the settings for the PPP-Blinky network adapter.
35a. Be sure to unplug the USB cable of your mbed board. (should be unplugged already) Restart (yes, RESTART) Windows. Wait patiently until all drivers have loaded. Then replug your mbed board.
36. Now, find Control Panel - Network and Sharing Center - Change adapter settings, right-click on PPP-Blinky and then click Properties for the second time. (We already performed this in step 27).
37. Click Configure and ensure the speed is set to 115200 and all three options are unchecked. If you did not perform the windows restart, you may not be able to make this change permanent - the values will change back:

38. It's crucial to now go back to step 27 and carefully re-check all the network adapter settings against the screen dump - especially step 37. Windows sometimes inexplicably changes these values!!! Also, if you are unable to permanently change a setting, or settins inexplicably revert back to other values, it's time to restart Windows, which properly sequences all the settings and driver changes.
G. Test the connection
39. Ensure that you have compiled the PPP-Blinky source code for your mbed hardware platform, (use compile-all), have downloaded the binary, and have pressed the reset button on your board to ensure the latest downloaded binary is running.
40. Start a modem communication program such as Tera Term, set it to your mbed board's COM port, (COM3 in this example) and set the baud rate to 115200. Now, every second time you type a "" (tilde), the LED on your mbed board should toggle, because a tilde is 0x7E, which is the PPP frame delimiter character, and PPP-Blinky toggles the LED on every second PPP frame that has been received. Press reset on your mbed board now, because once PPP blinky sees a tilde character, it assumes that it is "online" and will not respond to dial-up commands from the PC until it has received an LCP-end packet to end the connection. So, to re-iterate, press reset on your mbed board now. Alternatively, Alt-B, which sends a line break in Tera Term, also works to reset many mbed-enabled boards.
41. From Tera Term, type in the string CLIENT in all-caps. PPP-Blinky should respond with the string CLIENTSERVER. This is the dial-up response string expected by Windows to signal a successful direct cable connection between two computers. Press reset on your board now, because once again PPP-Blinky is now in a mode to receive PPP packets.
42. If your mbed board responded to the tilde characters and the CLIENT string, and your network adapter settings are properly set up, you are probably ready for a TCPIP connection!
43. From Control Panel - Network and Sharing Center - Change Adapter Settings, click on PPP-Blinky to highlight the entry, then click on Start this connection:

44. In Windows 8.1 I then see this, and click on PPP-Blinky to start the connection:

45. You should see the LED flicker on your mbed board (the LED toggles every second time a PPP packet is received) and after a short while your new adapter should report itself as connected.

46. Open a Command Prompt and type ping 172.10.10.2:

You should be able to see ping responses from PPP-Blinky at 172.10.10.2.
47. Open a Windows Command Prompt and type powershell invoke-webrequest -URI 172.10.10.2/x.
This instructs windows to fetch the page /x on PPP-Blinky using HTTP. The response is seen below:

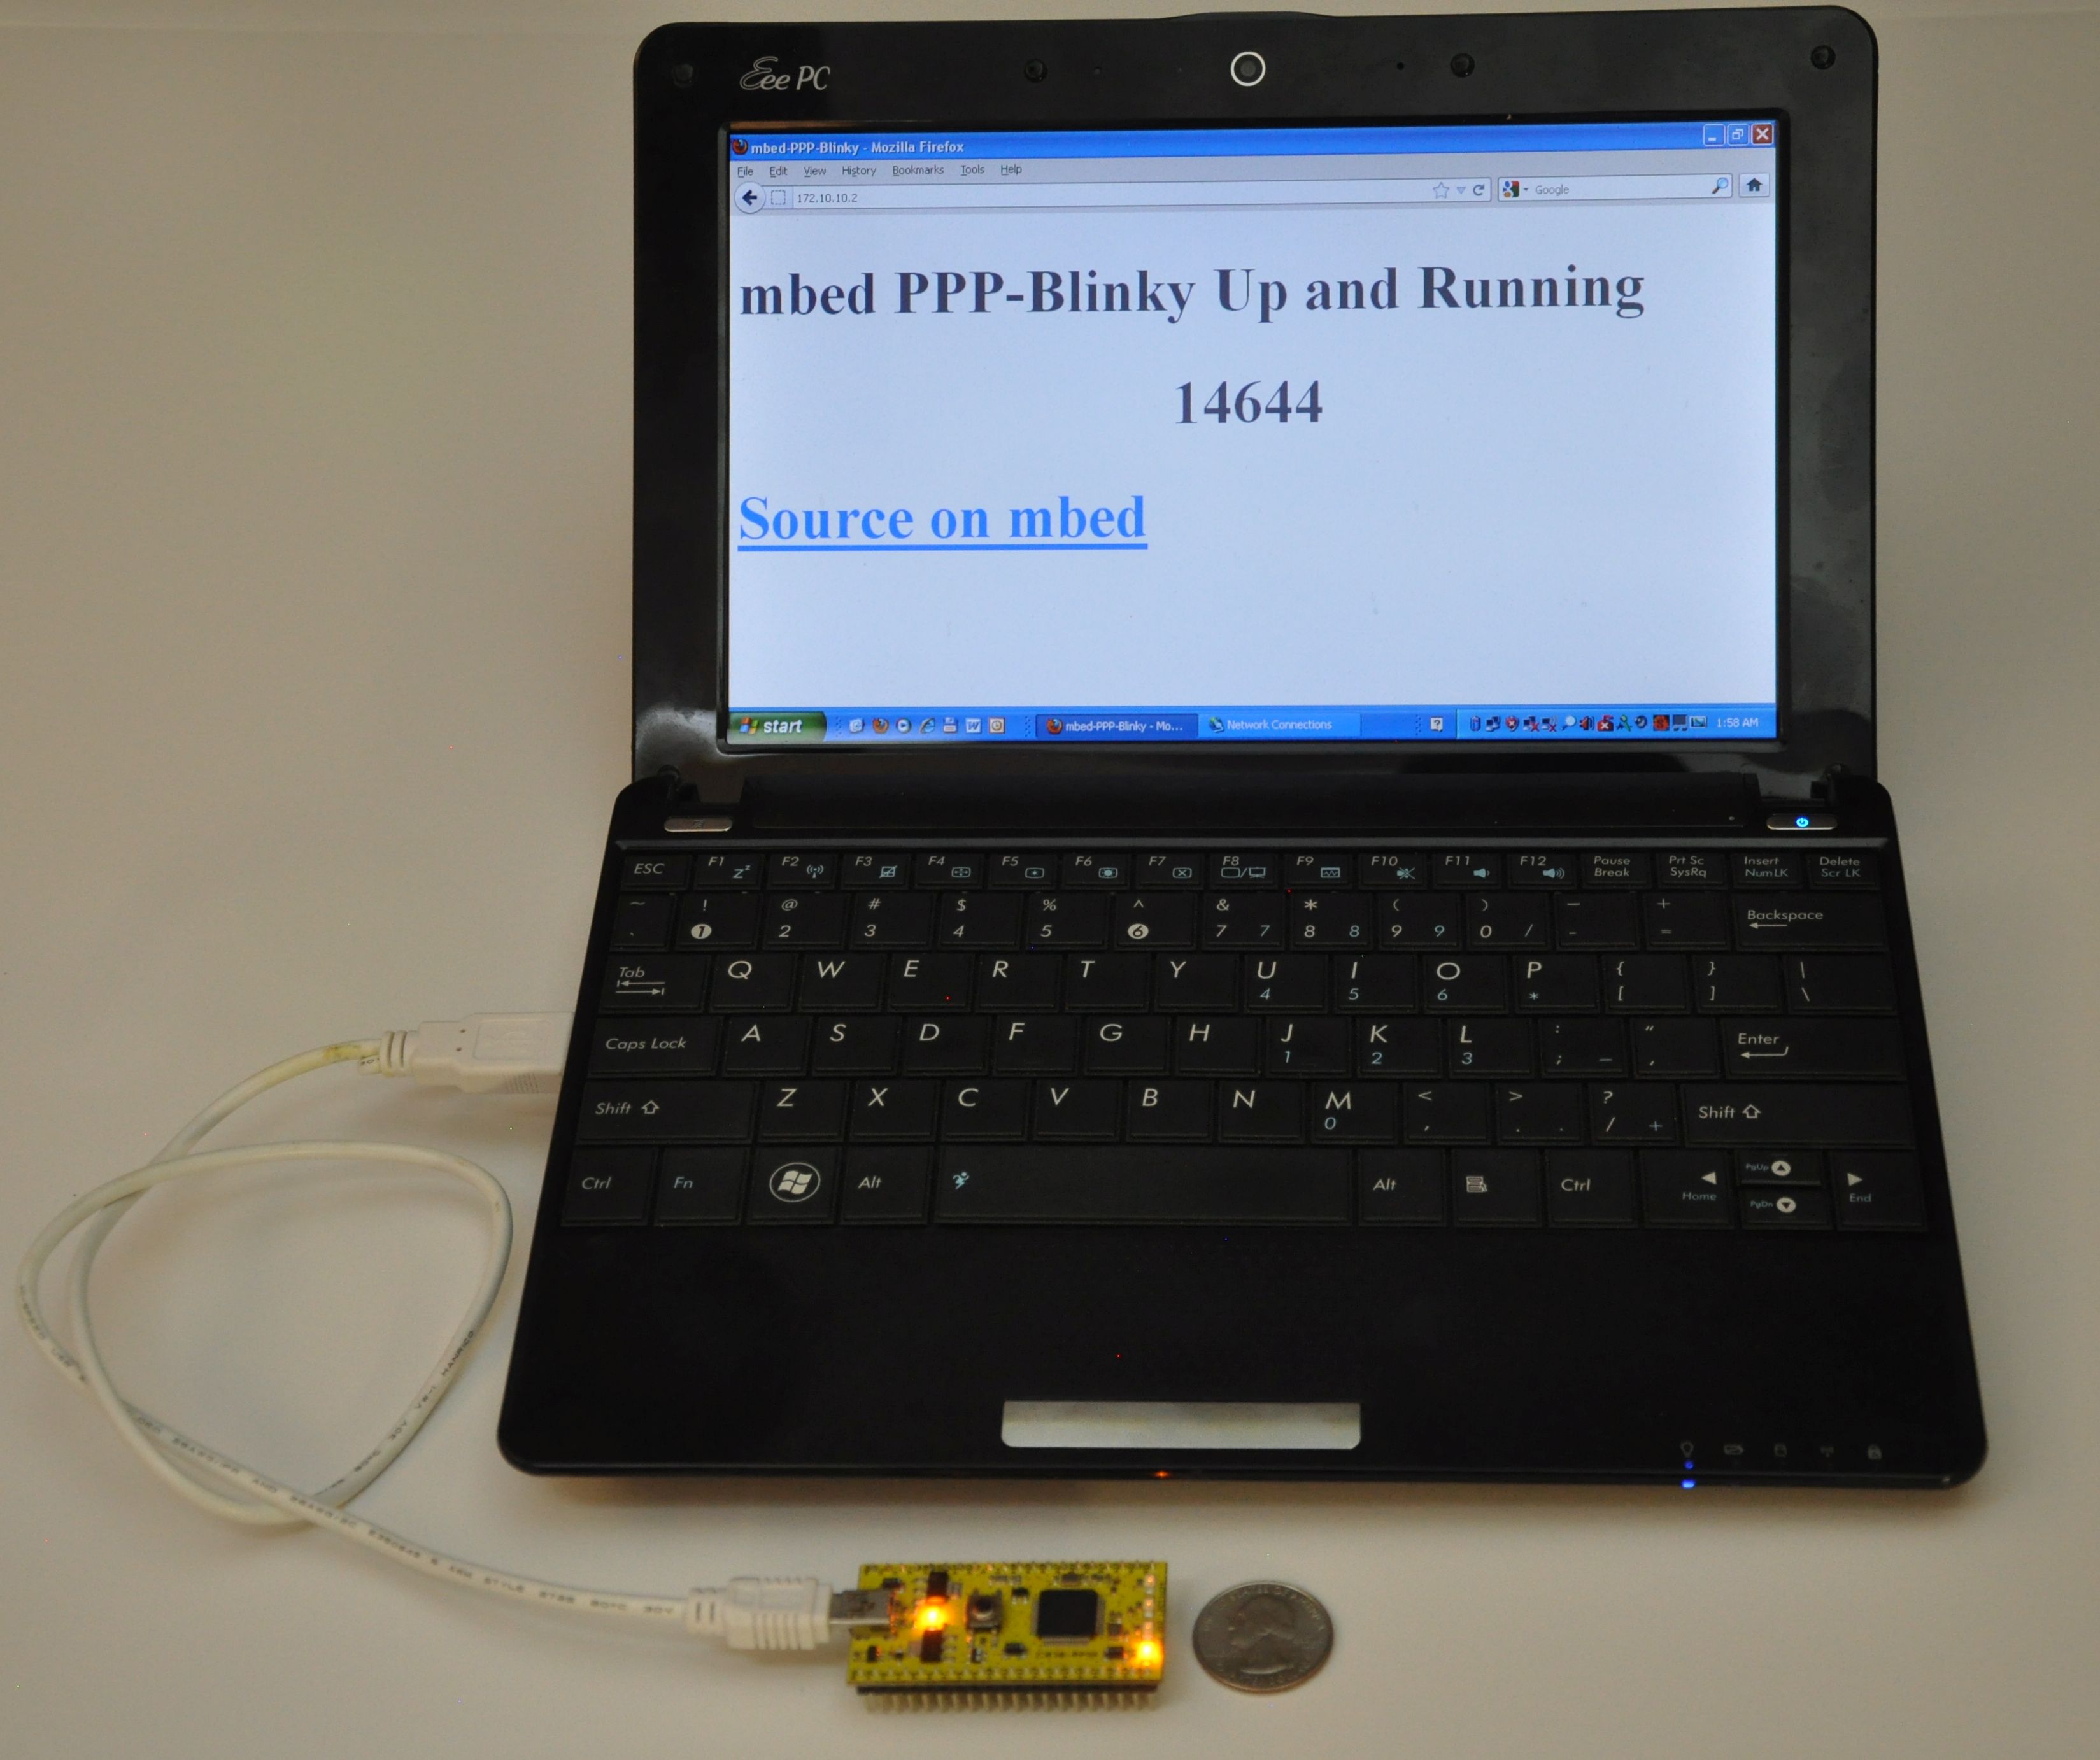
Of course, you can also type the above URI in your favorite web browser - fetching the page http:172.10.10.2/x simply returns a number that increments with every HTTP GET, which is handy for benchmarks. echo GET /x | nc 172.10.10.2 80 should also fetch the page if you have netcat (nc.exe) installed. The PPP-Blinky main page is here http://172.10.10.2
H. Congratulate yourself repeatedly, maybe even call your mother
You did it! You have duplicated the Internet! Pat yourself on the shoulder, or even better, make a screen dump and post it here: https://developer.mbed.org/forum/helloworld/ with "PPP-Blinky" somewhere in the title, along with any comments regarding your experience, what mbed hardware you used... a picture of your setup would be very nice too, mine is here /media/uploads/nixnax/blinky-to-laptop1.jpg )