PC Remote Control for mbed
by Michael Alemayehu, Austin Dong, and Jeniffer Logreira
Introduction
Do you like to watch movies on your laptop? When watching movies, is your computer usually far away from your place of comfort? Well, it's time to enhance your movie-watching experience by remote controlling your computer using everyone's favorite embedded microprocessor, ARM mBED!
Many embedded devices use handheld IR and RF remote controls. Consider television and radio; they typically use infrared remote controls. Remote controls send different signals depending on the manufacturer and which specific button is pressed. Some buttons on the same remote also send signals of varying-length. Lots of good information about IR remote controls can be found here.
Parts & Equipment
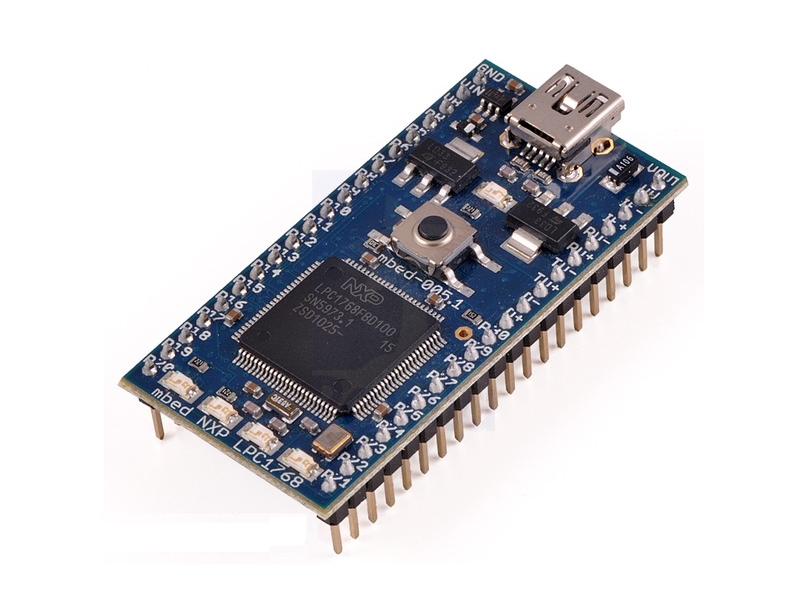
For this project, you will be using the mbed LPC1768, one of many ARM microcontroller development boards designed for rapid prototyping.

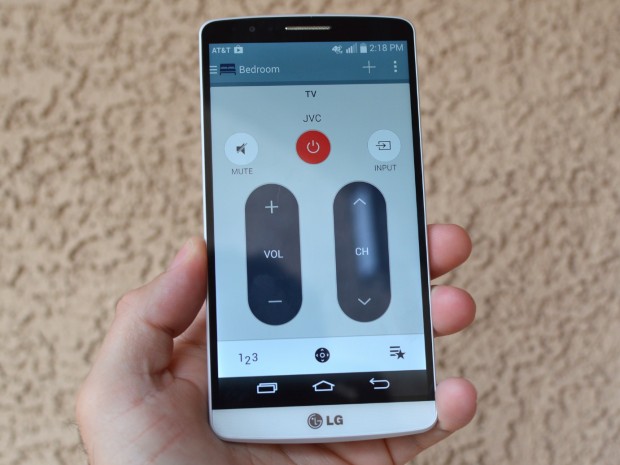
In order to transmit data, you will need an IR transmitting device, for our project we used the LG G4 phone with the Quick Remote App pictured below, but you can use any TV remote.

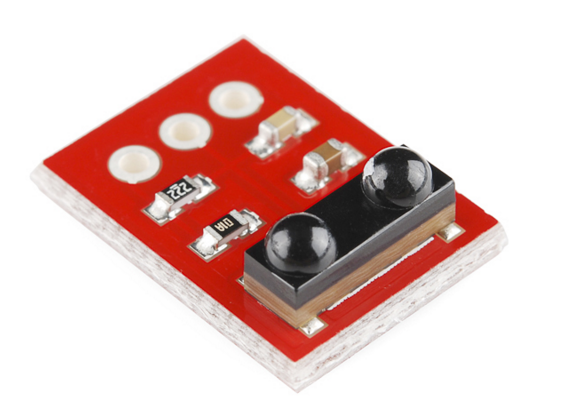
The infrared signals sent by the phone App will be received by an IR receiver module by Sparkfun, shown below, which contains a Vishay TSOP853 38 kHz IR Receiver module. The receiver then transmits the signal to one of the mBED's RX pins (pins 10, 14, or 27).

The pin assignments from the IR receiver to the mbed are shown in the table below.
| mBED | IR Receiver |
|---|---|
| gnd | gnd |
| Vout | Vcc |
| pin 14 (RX) | OUT |
Code
mBED:
To get started, you will need to know what the values of the IR signals are. To do so, you can use the code below, which will read in the signals received by the IR receiver and output the values on a terminal application in the host PC through a "USB Virtual Serial Port" over the same USB cable that is used for programming. For more information on using your mBED to establish Serial Communications with a PC or for information to download a terminal application for your OS visit: https://developer.mbed.org/handbook/SerialPC.
Code for reading and writing serial data
#include "mbed.h"

Serial receiver(p13, p14); // the arguments are the tx(p13), rx(p14) pins used to connect the IR receiver to the mBED
Serial pc(USBTX, USBRX); // this line of code sets up the USB Virtual Serial Port

// mBED LEDs are used in this code to visually note when the devices are reading or writing
DigitalOut myled1(LED1);
DigitalOut myled2(LED2);

int main()
{
    receiver.baud(2400);
    pc.baud(2400);
    while(1)
    {
        if (pc.readable())
        {
            myled1 = 1;
            receiver.putc(pc.getc());
            myled1 = 0;
        }
        if (receiver.readable())
        {
            myled2 = 1;
            pc.printf("%x ", receiver.getc());
            myled2 = 0;
        }
    }
}
The code above can be imported using the link below.
Import libraryECE4180_FinalProject
Code that reads IR signals to create a PC remote for mBED.
Visual Studio:
The program was created and ran in Microsoft Visual Studio:
Information
The program first sets up the COM port to receive data from mbed at 2400 baud rate. You can use a program like Tera Term to find out which COM port the mbed is on.
Next, the program creates INPUT structures that are used for simulating keyboard commands. They can also be used for simulating mouse commands, but in our demo we only used the keyboard part.
Finally, the program begins looping to receive data from the mbed.
In our demo, the signals were 8 characters long so the program was set up to save 8 characters at a time.
After 8 characters were received, the program compares the whole string to hard-coded values to determine which keyboard buttons to simulate. Occasionally, the received signal was incomplete or there was interference. The program has a counter variable that resets everything if it spends too much time on a partial signal.

Project Video Demo
Please log in to post comments.
