Bluetooth-Controlled Robot Mini Design Project
Overview
The goal of this mini design project is to demonstrate a Bluetooth-Controlled Robot interfacing multiple components and parts previously used in ECE 4180 Course. Utilizing the Bluetooth Adafruit LE application controller, the mbed was able remotely controlled to trigger the motor and other components on the robot.
Components Needed
- mBed LPC1768 (1)
- Adafruit Bluetooth LE Board (1)
- Dual H-bridge (1)
- DC motor (2)
- Robot Kit (1)
- 2N3904 transistor (1)
- Sparkfun Speaker 8ohm .1W
- Barrel Jack Circuit Component (2)
- AA Batteries (8)
- 4-AA Battery Pack (2)
Bluetooth Adafruit LE
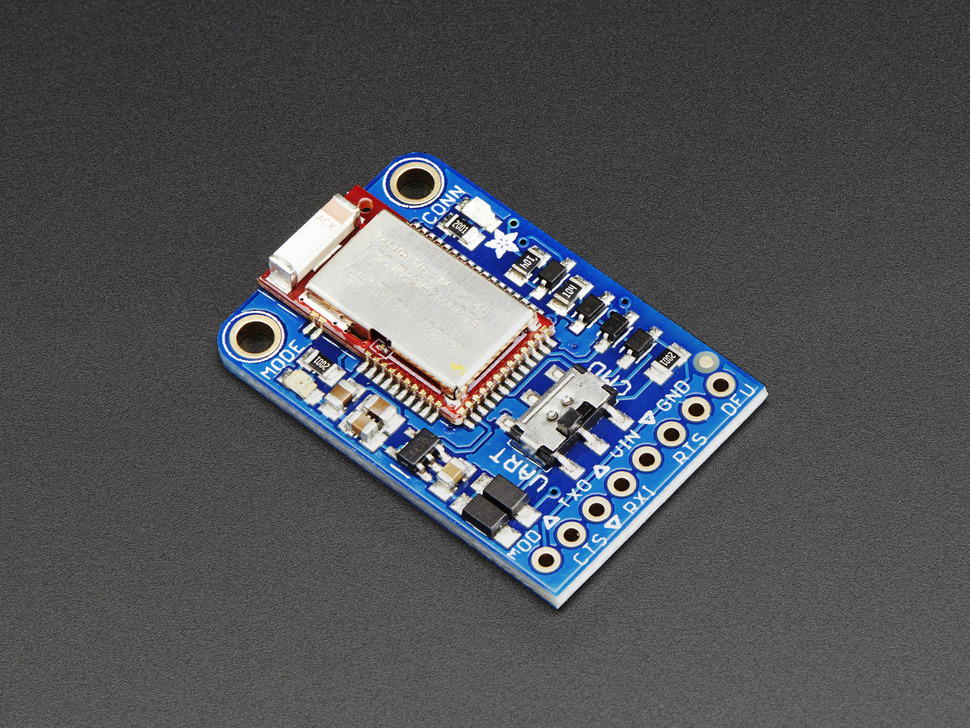
The low cost Adafruit Bluefruit BLE board features and ARM Cortex M0 core running at 16MHz with 256KB flash memory and 32KB SRAM. Peak current draw is <20mA (radio actively transmitting/receiving) Transport is a UART @ 9600 baud with HW flow control (CTS+RTS). It has on-board 3.3V voltage regulation and a Bootloader with support for safe OTA firmware updates. A UART mode or easy AT command set can be used (note switch on board above). Free demo apps along with source code is available for iOS or Android phones or tablets. The app supports over the air firmware updates, UART text transfers, user control pads, and IMU or GPS data streaming from the phone or tablet.
Adafruit Board:
Pin Assignments:
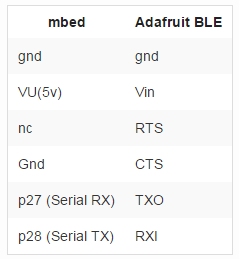
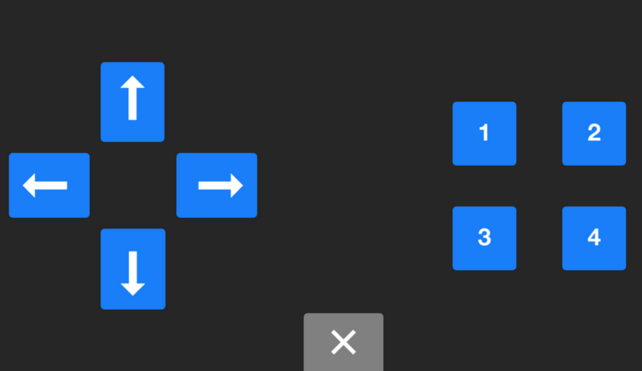
After wiring up the Bluetooth Adafruit Board, you must download the application at an application store whether Apple or Droid. Connect to the Adafruit Bluetooth Chip. Then select "Controller" to utilize the Adafruit Control Pad. See below.
BlueTooth Adafruit LE Control Pad:
DC Motor and Dual H-Bridge
To use a DC motor to demo speed control with PWM you will need to also add an H-bridge driver circuit. Use one of the DC robot kit motors for this section. Small DC motors tend to rotate too fast with too little torque for most robotic applications, so they are typically geared down to solve this problem. This motor has a 48 to 1 internal gear ratio. There is a dual (i.e. A and B) H-bridge driver module in the lab kit as seen below and a few spares in the lab. You only need to hookup one of A and B to a motor. To control both motors on your robot later will require both A and B circuits. Some basic H-bridge circuits will burn out, if you ever set forward and reverse on at the same time!
H-Bridge Chip and Pin Assignments for mBed-H-bridge-dc motor:
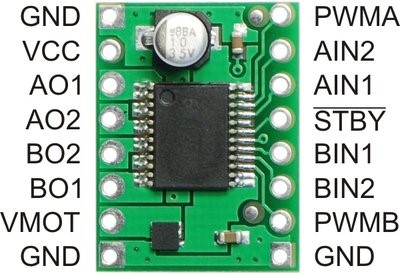
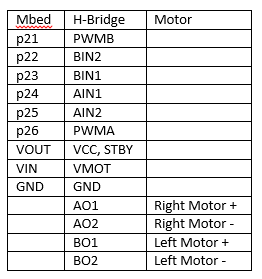
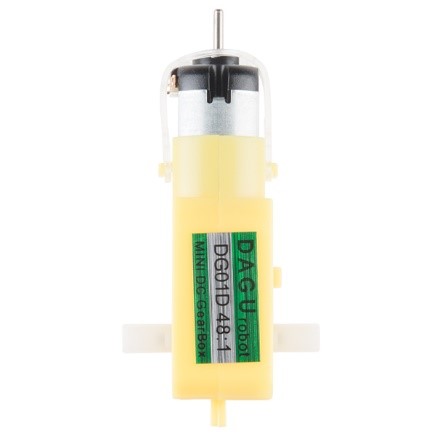
To power both motors you will need to utilize its own power supply. 4 AA batteries connected to a barrel jack must be used to power the H-bridge to control the motor. See components below.
4-AA Battery Pack Case and Power Barrel Jack:
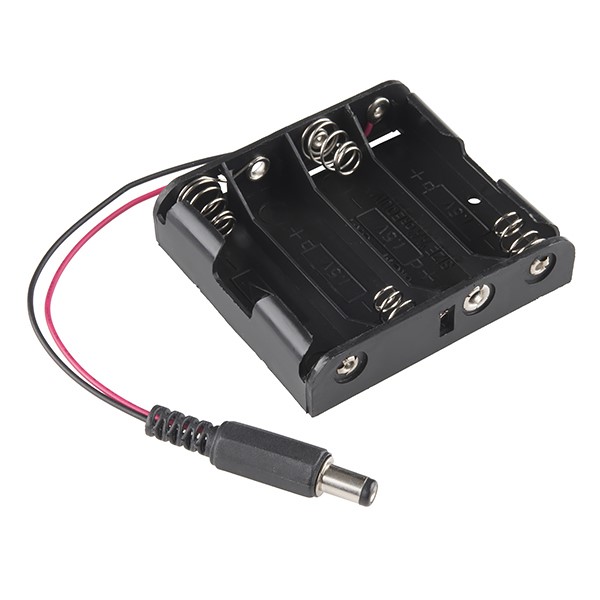
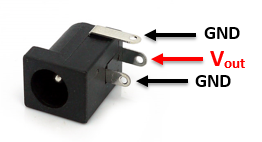
Speaker and Audio
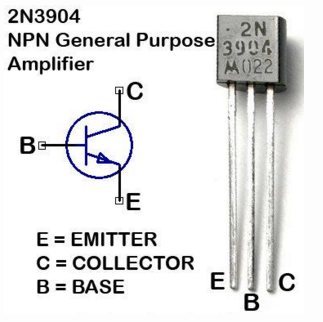
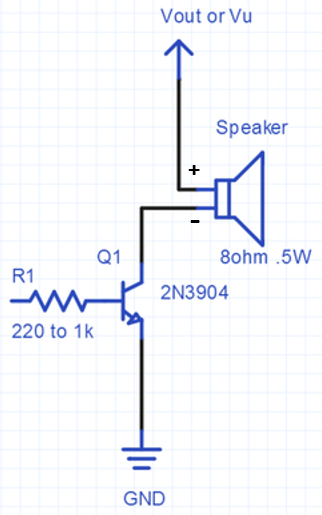
With just a small low cost speaker and a 2N3904 driver transistor is it possible to generate simple sound effects on mbed for under $2. Hooking up the speaker directly to an mbed output pin results in very low volume and a driver circuit is needed to boost the current levels to drive the speaker to provide adequate volume levels. Small piezo speakers will respond to a very limited audio frequency range without a driver, but the volume is still relatively low and is often only of use at the resonant frequency listed in the datasheet. The demo code will use a PWM output pin and then the AnalogOut pin. PWM output pins have a bit more drive current than the AnalogOut pin. The volume is even lower on the AnalogOut pin without a driver.
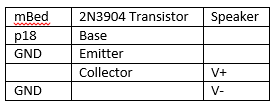
Speaker, Transistor, and Circuit Diagram w/ Pin Assingments:

The next approach for generating complex audio signals and music is to play back recorded audio using audio samples. The memory required is too large for mbed's internal memory and the audio sample values are needed so fast that an SD card is typically used to store the audio data in a file. The most common file for audio data on the PC is a *.wav file. There are several waveplayer examples in the cookbook. There are also some recorders and players. They read audio data from a *.wav file and output data using timer interrupts and the analog out pin similar to the analog example described earlier. Audacity can be used to record, edit, and convert sound file formats.
Code
Import programECE4180Lab4
Mini Design Project demonstrating a Bluetooth Controlled Robot
Project Demo
Design Project Image:
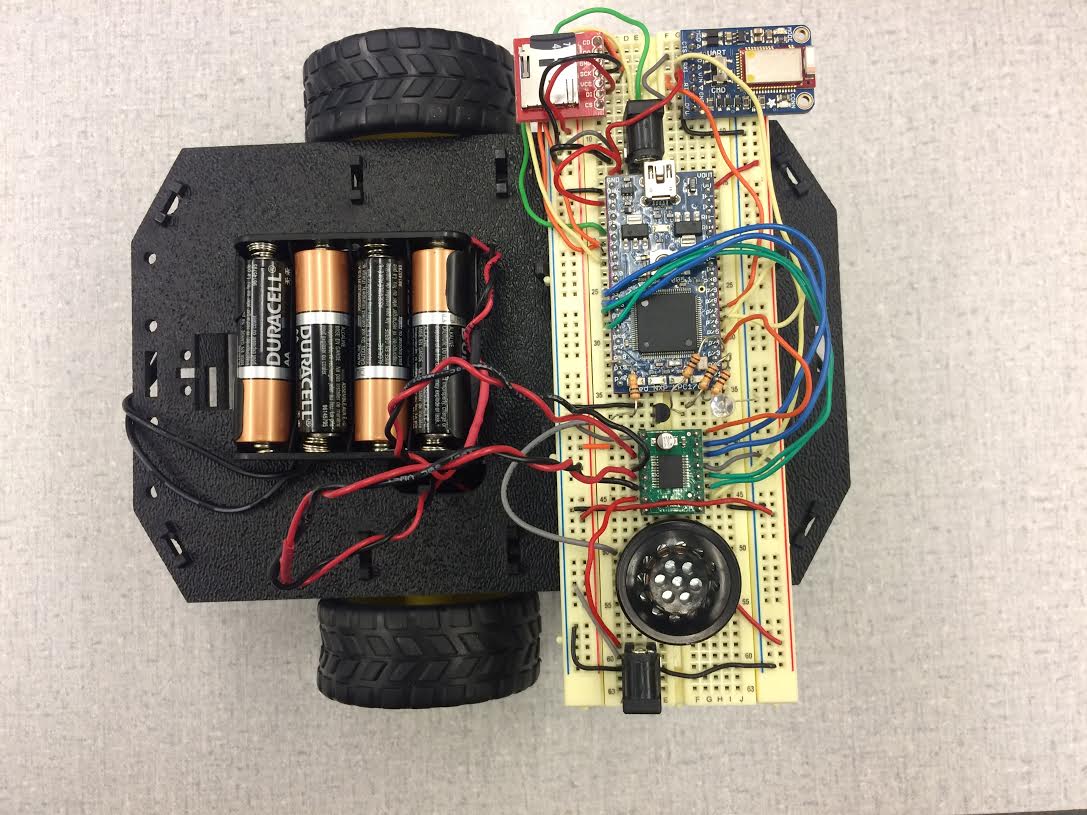
The demonstration shows the robot being controlled via Bluetooth. Also includes the increasing and decreasing of speed. RGB LED included to signal stop, go, and reverse. Sounds included via speaker and amplifier circuit.
Please log in to post comments.
