ADNS2051 Library Program Demonstration
Design, build and play around with the mBed is very easy, I would say too!
After seeing some of the projects on the Web that uses the optical sensor of the most common mouse, I realized very quickly this library to one of the most famous mouse made by Apple.
This project means to knock out the mouse, of course, so be careful: choose a mouse with broken parts or that "for sure" you do not use anymore because you do not return back!
The library is very simple. The optical processor is interrogated, and many of its information is made available through the call. Including a snapshot of what the sensor is seeing: a 16x16 bitmap to 64 levels of gray.
The mouse modified
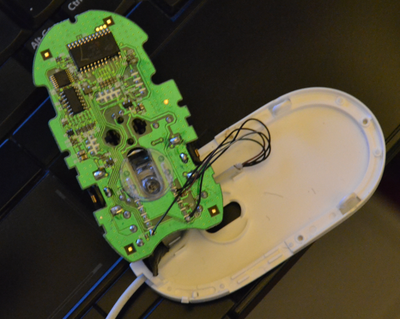
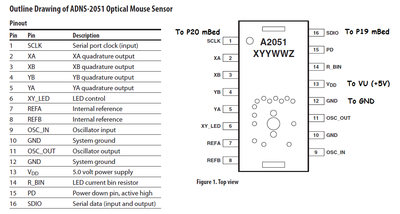
Where to cut the pins
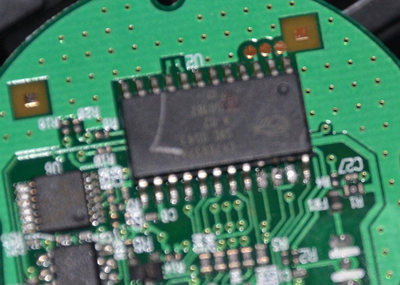
The flow of data is done using two pins: data in/out and clock. The process of writing is not a problem, the stage of reading involves first writing the register interested in reading, then the pin change the direction and read the data. No problem for the mBed which already has a solution in your pocket: using the "DigitaInOut" the game is done!
The sample program is enhanced by some image processing functions. I have these functions derived from two books I borrowed from a friend.
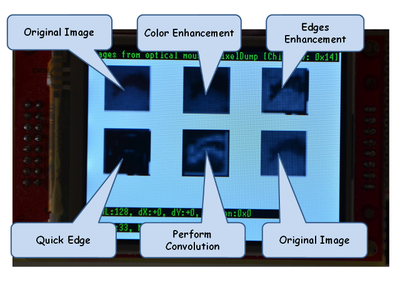
The project uses the graphics library for LCD MI0283QT-2 to output the result.
Import programADNS2051_tst
ADNS2051 Library Program Demonstration
This is the code to initialize the optical mouse:
* #include "ADNS2051.h"
*
* // pin configuration: p19: sout, p20: sclk
* ADNS2051 optical( p19, p20);
*
* // image buffer
* unsigned char tmpmap[256];
*
* int main( void)
* {
*   printf( "Images from optical mouse: Init");
*
*   // wait until the ADNS chip become ready...
*   while( optical.init() );
*
*   optical.setframerate();
*
*   printf("Images from optical mouse: PixelDump [Chip rev: 0x%X]", optical.get_revisionID());
*   wait( 1.0);
*
*   optical.pixeldump( &tmpmap[0]);
*   // may be... do something with tmpmap...
*   while(1);
*
* }
The initialization code is very simple. After the pin configuration, remember that the code use p19 as a bidirectional line, the code start a loop waiting for the optical.init success. The init function perform a start sequence of high/low value to the out pin, and then wait for a second to reset the read/write sequence inside the optical mouse. More precisely, the optical mouser after this incomplete sequence let expire the serial watchdog timer, starting a new fresh communication handshake.
After that the code check the value of the "product ID" register to confirm the correct connection to the optical mouse chip.
To check if the optical mouse is "flying" or not, check the SQUAL value: SQUAL is nearly equal to zero, if there is no surface below the sensor. To check if the optical mouse is "walking" let check the result of "readmotion()" : zero is "no walking", one is "walking".
The example project do some image "processing" manipulation. Using the USB-serial port yuou can change some important parameter and change the result of visualization:
- [T/t] threshold ON/OFF
- [V/v] threshold value inc/dec
- [H/h] high value inc/dec
- [E/e] edge enhancement inc/dec
- [m] change mask type
- [g] change gamma value
The schema
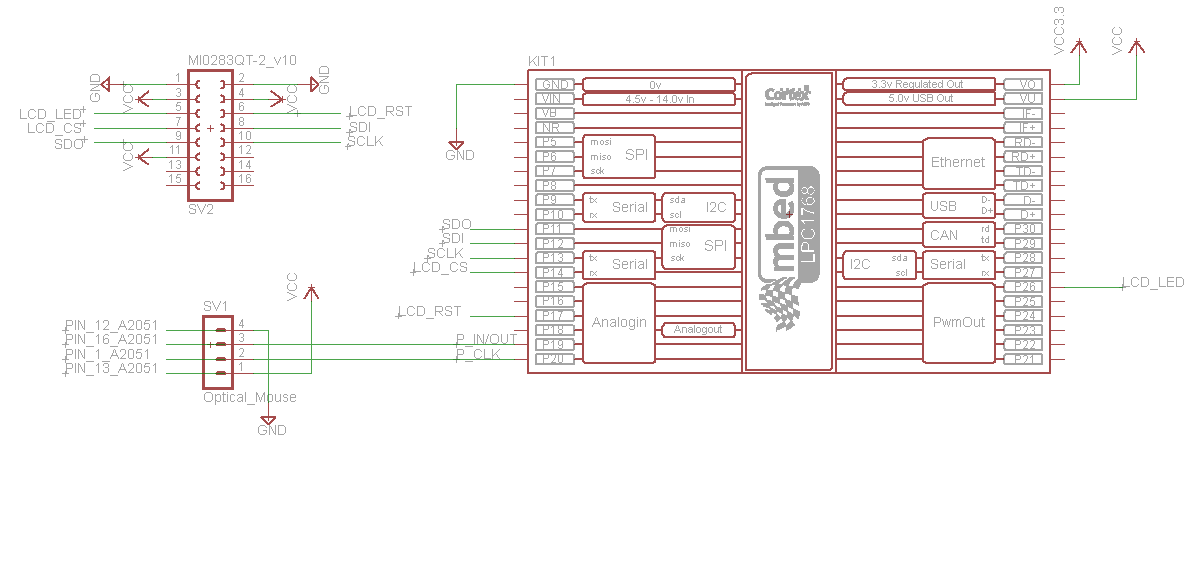
From the datasheet
Please log in to post comments.
