VSCodeでSTM32マイコンのデバッグ環境を構築する
Visual Studio Code (以下、VSCode)上で、STマイクロのNucleoやDiscoveryボードを使ってビルド、デバッグを行う方法を記載します。
必要なソフトウェアのインストール
VSCodeのダウンロードとインストール
使用するホストマシンに応じたインストーラをダウンロードして、インストールを行います。 https://code.visualstudio.com/Download
C/C++機能拡張のインストール
VSCodeを起動します。メニュー「表示」から「機能拡張」を選択し、C/C++機能拡張をインストールします。
OpenOCDのインストール
Macの場合
$ brew install openocd --enable_stlink
Windowsの場合
http://gnutoolchains.com/arm-eabi/openocd/
Mbed OS用ビルドツールのインストール
以下のnotebookの「Mbed CLIと関連ツールのインストール」の項目を参照してください。
https://os.mbed.com/users/MACRUM/notebook/mbed-offline-development/
Windowsの場合は、この他にmakeユーティリティのインストールが必要です。
http://gnuwin32.sourceforge.net/packages/make.htm
プロジェクトの設定
プロジェクトを作成します。ここでは、Mbed OSのサンプルコードをインポートしてみます。
$ mbed import mbed-os-example-blinky
VSCode用にプロジェクトをエクスポートします。
$ mbed export -m DISCO_L475VG_IOT01A -i vscode_gcc_arm
上記操作でビルドとデバッグに必要なファイルが生成されるので、同じディレクトリからVSCodeを開きます。
$ code .
プロジェクトファイル内の.vscode/launch.jsonを開き、以下の4箇所を変更します。
1. debugServerArgs の変更
Windows:
"debugServerArgs": "-f \"C:\\Program Files (x86)\\OpenOCD-20170821\\share\\openocd\\scripts\\board\\stm32l4discovery.cfg\" -f \"C:\\Program Files (x86)\\OpenOCD-20170821\\share\\openocd\\scripts\\interface\\stlink-v2-1.cfg\" -c init -c \"reset init\"",
Mac:
"debugServerArgs": "-f /usr/local/Cellar/open-ocd/0.10.0/share/openocd/scripts/board/stm32l4discovery.cfg -f /usr/local/Cellar/open-ocd/0.10.0/share/openocd/scripts/interface/stlink-v2-1.cfg -c init -c \"reset init\"",
Information
debugServerArgsで指定するボード用のコンフィグレーションファイルは、実際に使用するボードに搭載されたMCUまたは同じシリーズを選択してください。Windowsの場合は、パスをダブルクォーテーションで括ります。
2. serverStarted の変更
"serverStarted": "target halted due to debug-request, current mode: Thread",
3. MIDebuggerPath の変更
Windows:
"MIDebuggerPath": "C:\\Program Files (x86)\\GNU Tools ARM Embedded\\5.4 2016q3\\bin\\arm-none-eabi-gdb.exe",
Mac:
"MIDebuggerPath": "/usr/local/bin/gcc-arm-none-eabi-6-2017-q1-update/bin/arm-none-eabi-gdb",
4. debugServerPath の変更
Windows:
"debugServerPath": "C:\\Program Files (x86)\\OpenOCD-20170821\\bin\\openocd.exe",
Mac:
"debugServerPath": "/usr/local/bin/openocd"
ビルドとデバッグ
メニュー「デバッグ」から「デバッグの開始」を選択して、デバッグセッションを開始します。

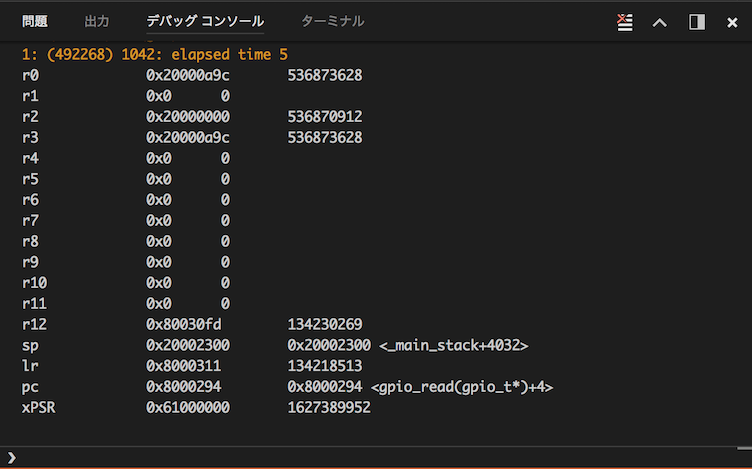
汎用レジスタの表示などは出来ませんが、デバッグコンソールから以下のコマンドを入力して表示可能です。
-exec info registers

Please log in to post comments.
