Mbed Air Drums
Project By:
Kristen Fernandez, Pratik Gangwani, Krish Ravindranath, Justin Tamayo (All section B)
Overview
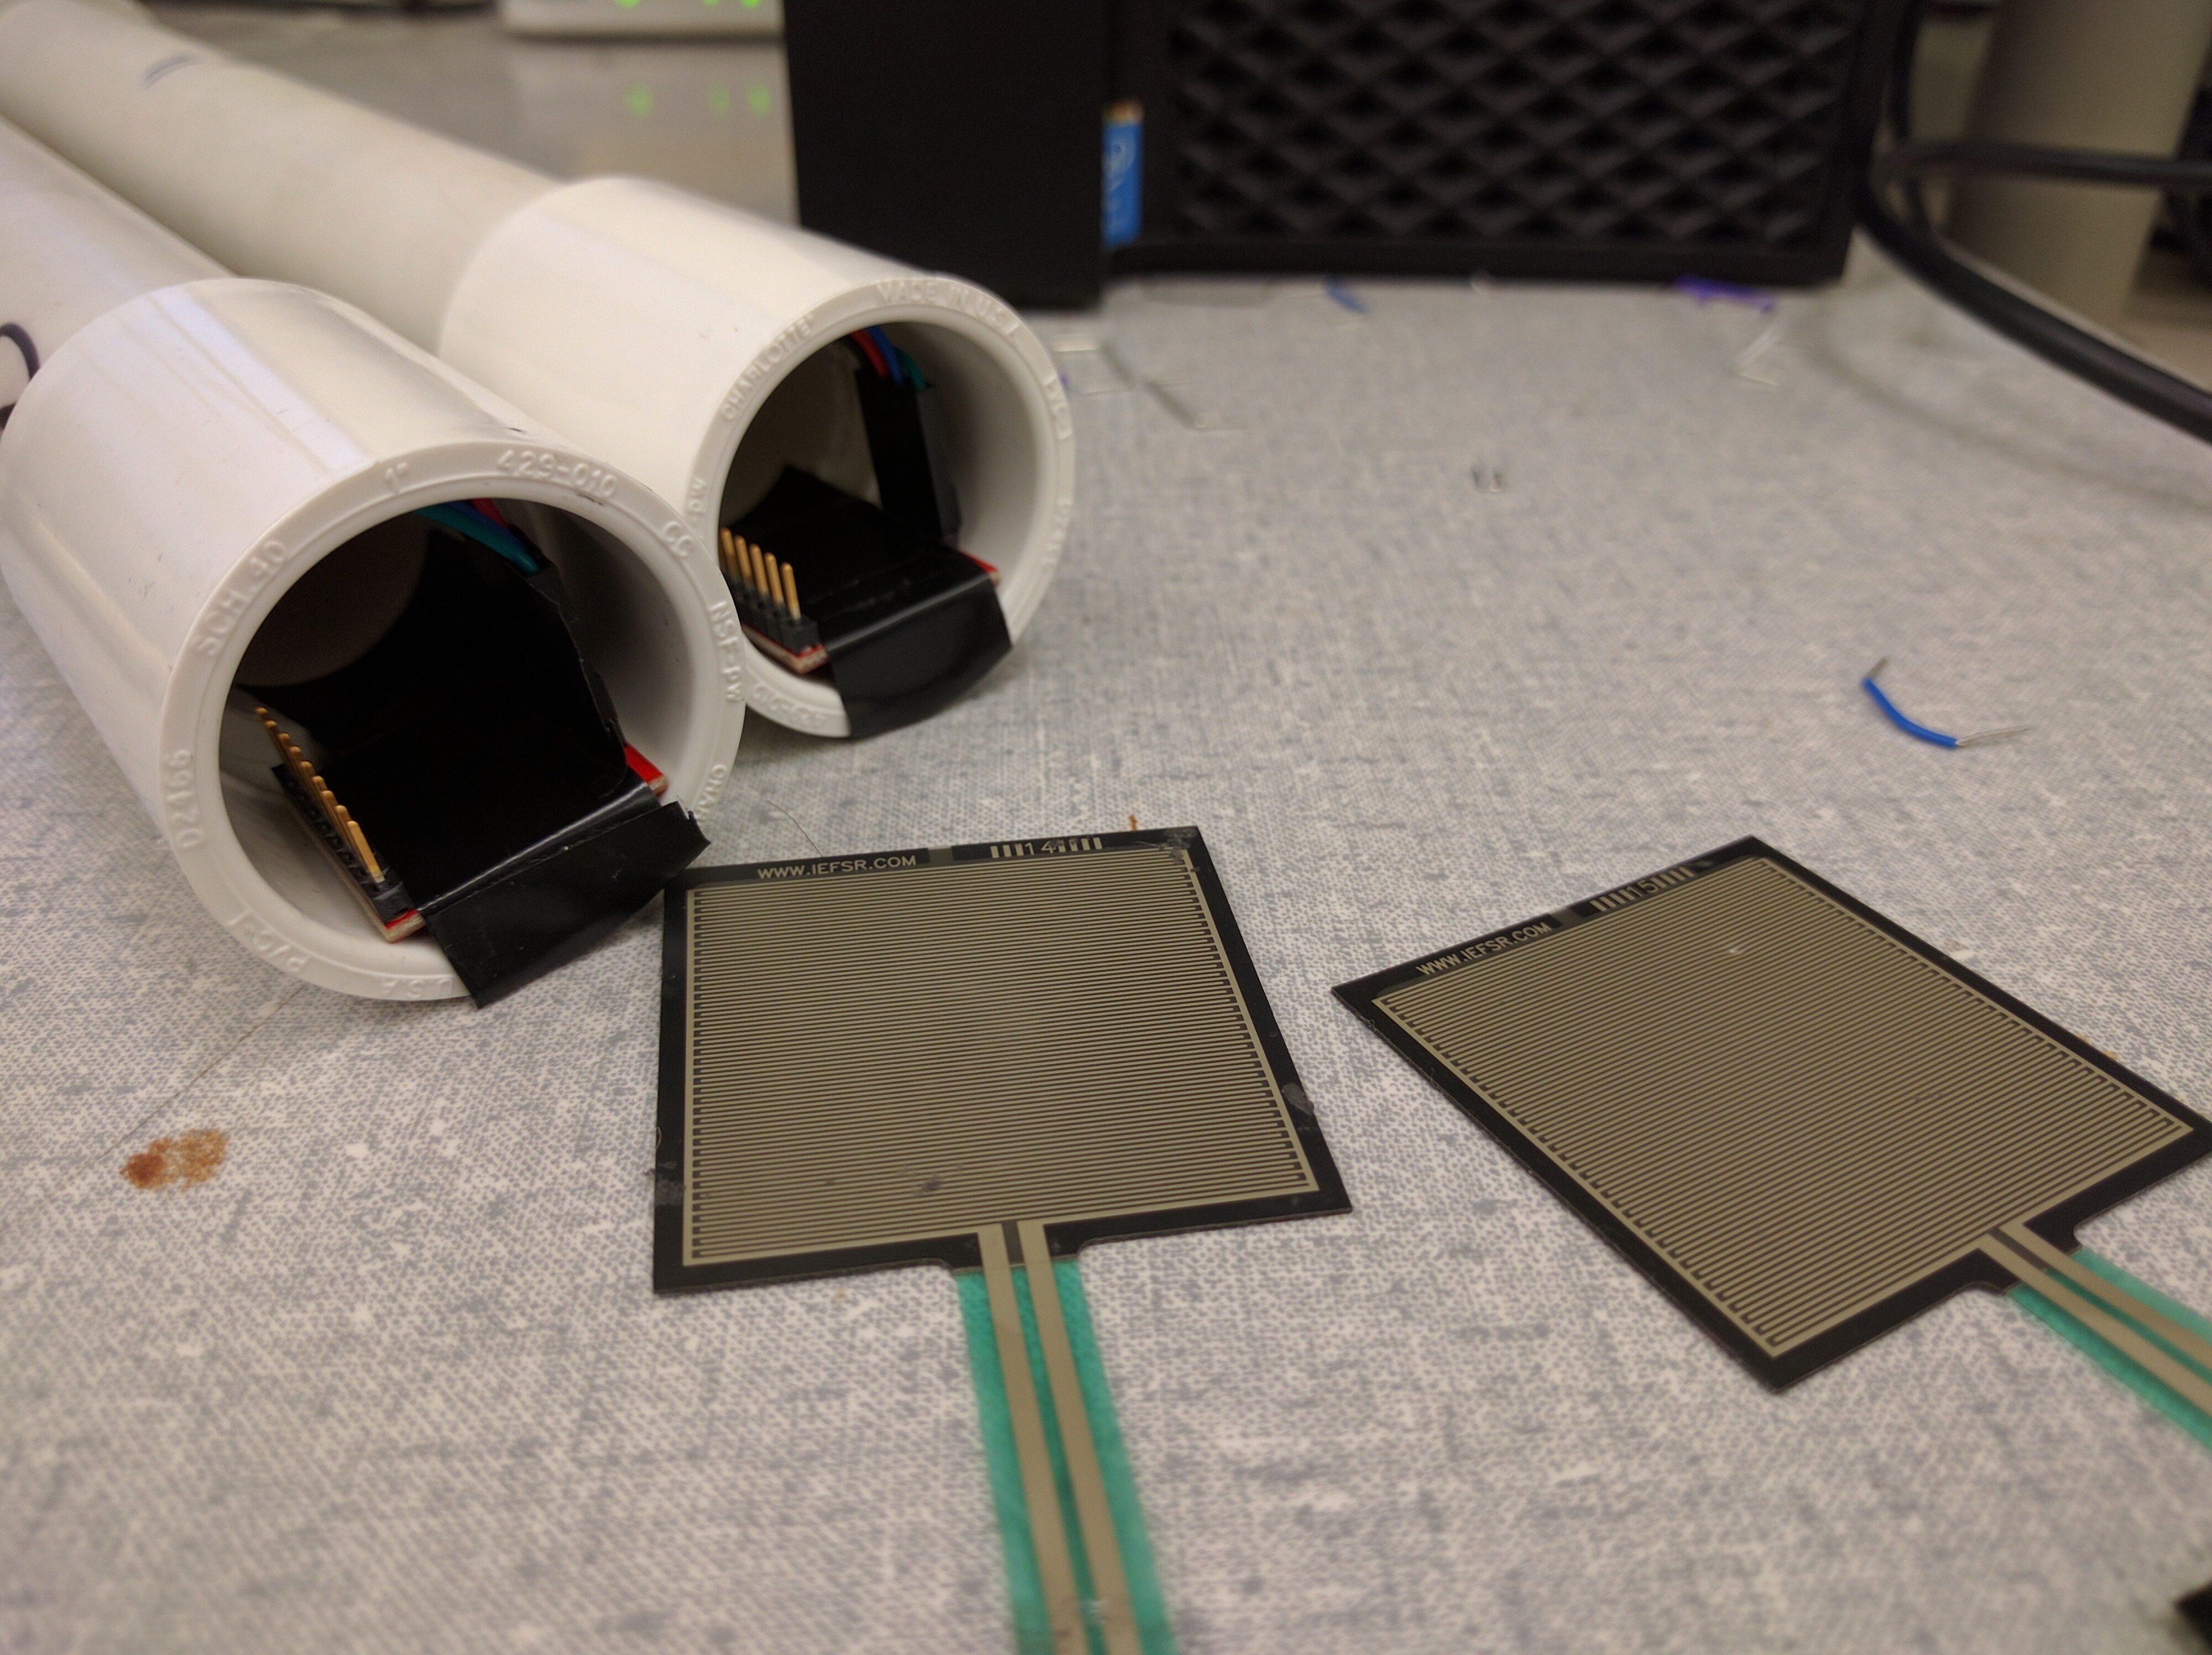
We attached two LSM9DS1 IMUs to two PVC ‘drumsticks’ that will measure angular velocity and acceleration in the x- and y-axes. This data is sent back to the mbed, which plays a note using the MIDI protocol when it detects when a ‘hit’.
A user can play different drums and cymbals; the position in the x-axis determines which drum or cymbal sound is triggered. The acceleration of the movement in the y-axis determines the volume of the sound; the faster the movement, the louder the sound.
Additionally, the mbed Air Drum Kit utilizes two FSRs (Force Sensitive Resistors) that are placed on the floor - one to trigger the bass drum sound, and the other to switch the hi-hat sound mode (to emulate how an actual drumset works).
The MIDI protocol is used to trigger notes as it a robust standard in the music industry. The drum sounds are generated by sending MIDI messages to FL Studio, a digital audio workstation (DAW). MIDI messages can be played on any similar DAW and can also be used to control MIDI-enabled instruments and synthesizers. This means that this setup could be used to play any sounds that can be generated by the DAW and it’s accompanying plugins, not just the drum sounds, and could even be hooked up to MIDI instruments and synthesizers to make interesting sounds. Furthermore, the instrument can be used to record beats and sounds made in the DAW.
How to use
The USB breakout board must be connected via USB to a computer that has MIDI software open. In your MIDI software, check that it is accepting Input through USB.
Once you start the program, you must hold the drumsticks in a starting position while the IMUs are being calibrated. During calibration, ensure that the drumsticks are parallel as possible to the ground - this will provide a better calibration and more accurate hit detection. Calibration only takes a few seconds.
After calibration, you can begin playing. Simply swing the drumstick down as if you were hitting a real drum, and the software will detect a hit and play a sound on your MIDI software. To switch instruments, quickly move your left drumstick to the left or your right drumstick to the right. To switch back, move either drumstick back to the center.
The right drumstick is traditionally used to play the cymbals while the left drumstick is on the drums, and as such our right drumstick plays a hi-hat on the left, and a ride cymbal in the middle while the left drumstick plays a snare on the left and a clap in the middle.
The FSRs on the floor can be triggered simply by stepping your foot down on them. The FSR on the right will trigger the bass drum sound, while the FSR on the left will trigger the hi-hat pedal sound and switch the hi-hat sound from open to close, as long as the FSR is being pressed.
Components
- LSM9DS1: More information on this component can be found at: https://developer.mbed.org/users/jmar7/notebook/sparkfun-9-degrees-of-freedom-imu-lsm9ds/
- USB Breakout Board: More information on this component can be found at: https://learn.sparkfun.com/tutorials/usb-type-a-female-breakout-hookup-guide
- Force Sensitive Resistors: More information on this component can be found at: https://www.sparkfun.com/products/9376
Wiring
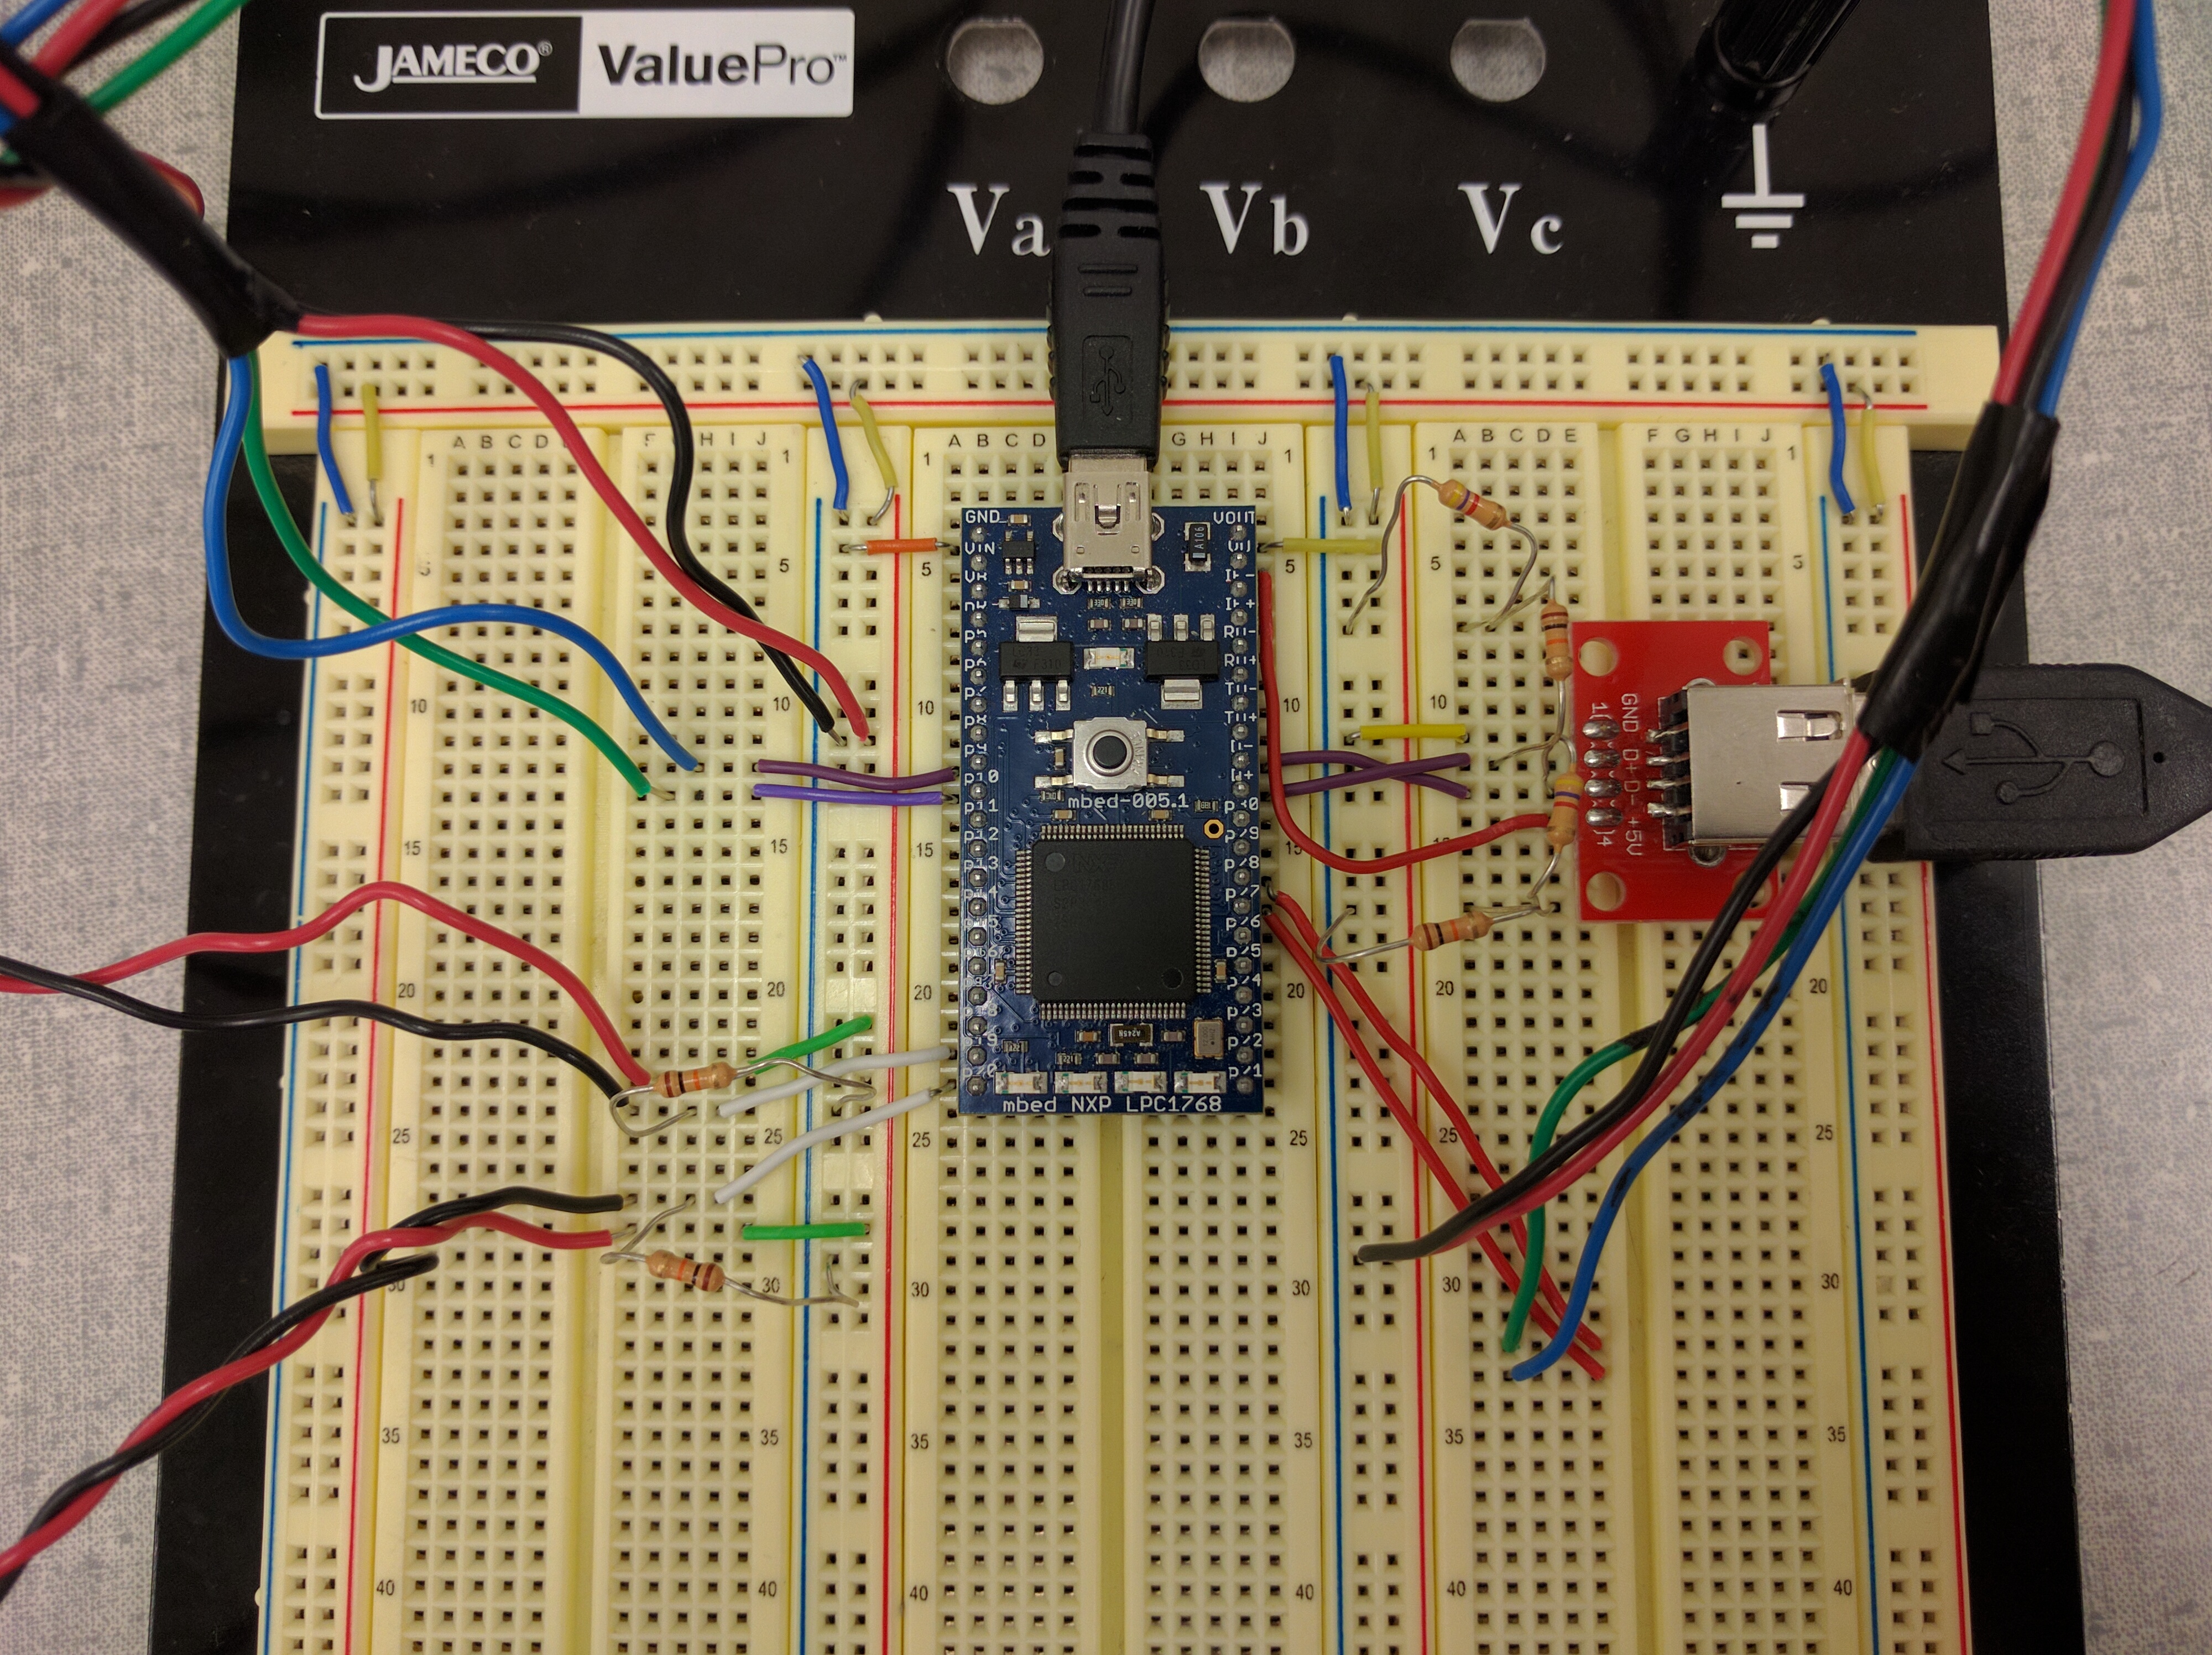
| mbed | Right LSM9DS1 | Left LSM9DS1 |
|---|---|---|
| GND | GND | GND |
| Vout | VDD | VDD |
| p9 (SDA) | SDA | |
| p10 (SCL) | SCL | |
| p28 (SDA) | SDA | |
| p27 (SCL) | SCL |
| mbed | Right LSM9DS1 |
|---|---|
| GND | GND |
| VU | VCC |
| D- | D- |
| D+ | D+ |
Additionally, add 2 15kΩ pull-down resistors on the D+ and D- lines. Attach one resistor from D+ to GND, and attach another from D- to GND.
| mbed | FSR_Kick | FSR_HH |
|---|---|---|
| p20 | FSR_Kick_1 | |
| p19 | FSR_HH_1 | |
| Vout | FSR_Kick_2 | FSR_HH_2 |
| GND | FSR_Kick_1 | FSR_HH_1 |
Pull down both the FSRs to GND using 10kΩ resistors.
FSR_Kick is the FSR used to trigger the bass drum sound. FSR_HH is the FSR used to trigger the hi-hat pedal. The leads (1 and 2) on each FSR are interchangeable as there is no polarity.
Pictures
Wiring Overview

Drumsticks (with IMUs) and FSRs

Video
Code
Import programFINAL_PROJECT
Final version of project
Please log in to post comments.
