ON Semiconductor
ON Semiconductor (Nasdaq: ON) is a leading provider of power efficient semiconductor solutions to customers in the power supply, automotive, communications, computer, consumer, medical, wireless, mobile phone, industrial and military/ aerospace markets.
Eclipse Debugging on NCS36510
Debugging on NCS36510 with Eclipse Oxygen and PyOCD
This note will document the steps required to configure Eclipse Oxygen for editing, compiling, and debugging an mbed 5 project.
Installation, Setup, and Creating a New Project
- Ensure that the mbed CLI package, including all of its dependencies, is installed. A complete installation package is provided here Make sure that the system PATH variable includes a reference to the mbed executable (i.e. PATH = C:\Python27 \Scripts)
- Install latest version of Eclipse CDT. Download links can be found here. Note that a Java JRE or JDK is required to run Eclipse.
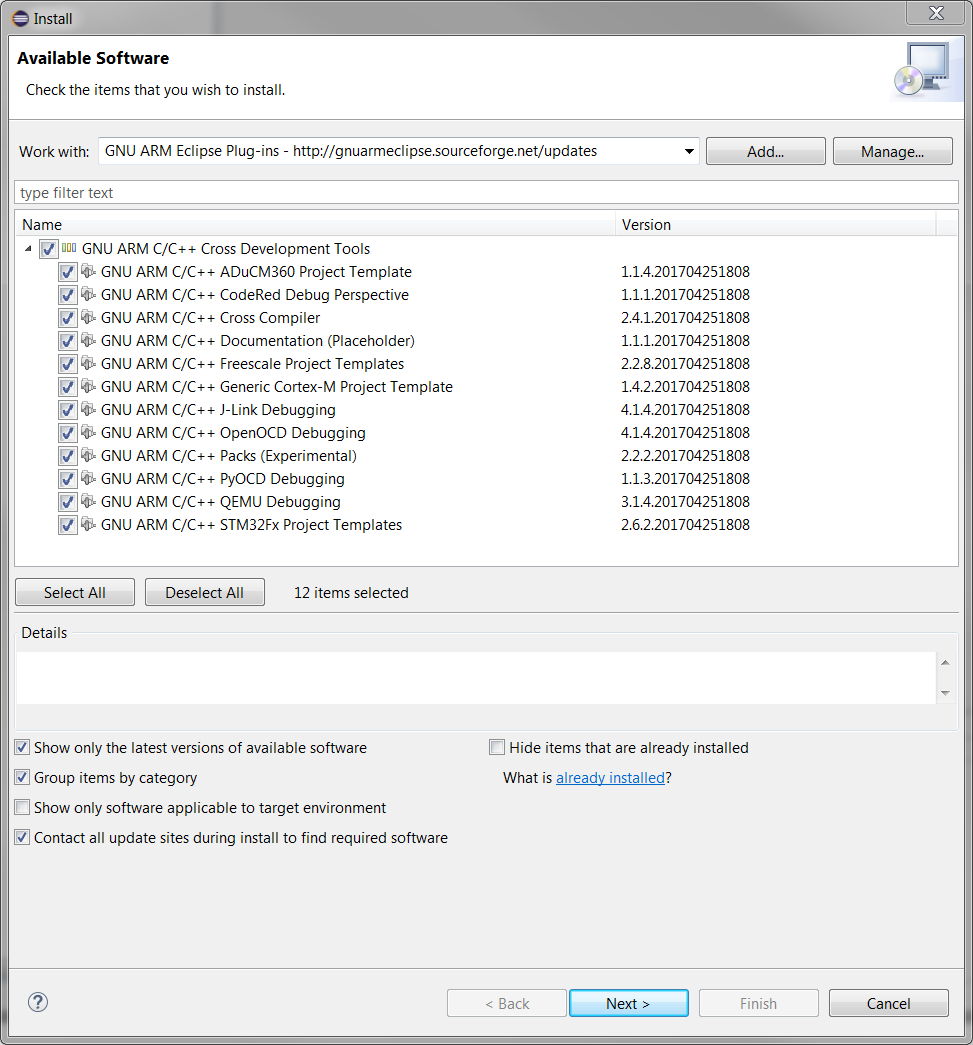
- Open Eclipse and select / create a workspace. From inside Eclipse, select Help -> Install New Software. In the "Work with" dialogue, enter "GNU ARM Eclipse Plug-ins - http://gnuarmeclipse.sourceforge.net/updates". At least the PyOCD package must be selected, then click "Next" and finish the installation process. Upon completion, Eclipse will restart, and the package will be available.
- Open up a command line window and navigate to a folder to be used as a workspace for mbed projects. Then use the mbed CLI tools to either create or import a new mbed project. An example of this is shown below:
mbed import mbed-os-example-blinky
Note
It is important that the Eclipse workspace and the project code are not in the same folder on the hard drive. If they are, it is possible that the code import will not work properly.
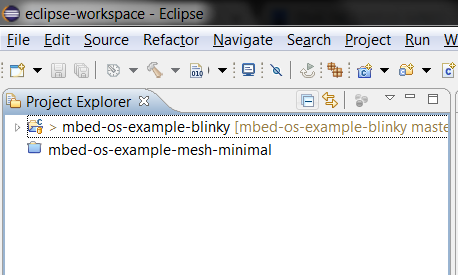
- Next, return to Eclipse, and import the existing mbed project through the "File->New->Makefile Project With Existing Code" dialogue. From this dialogue, browse to the location where the new mbed project is located. Select the folder itself, and then click "Ok". The project title will automatically be updated. Flick "Finish" and the code will be imported and will appear in the Project Explorer panel. At this point, Eclipse will automatically begin to index the project.

Note
Because the Eclipse exporter in mbed has not yet been enabled, there are many many #include and #define statements that will be missing in the code. This will result in Eclipse displaying many code errors, however the mbed CLI toolchain will generate these statements prior to compile-time based on the specifications in the project's .json config files.

Configuring the New Project for Compiling and Debugging
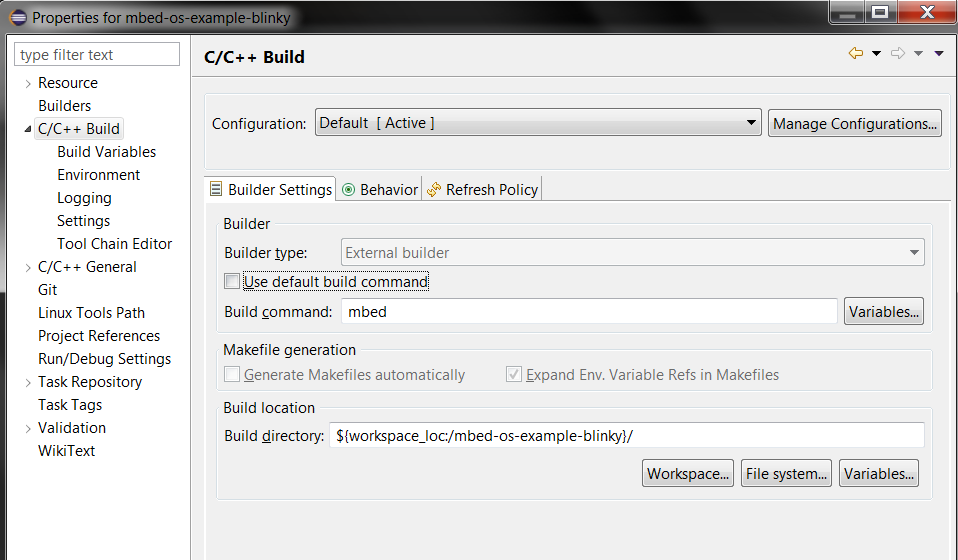
- By default, the project will be set to build using the Make toolchain. The NCS36510 requires the mbed CLI toolchain to compile. To change this, right click on the project in the Project Explorer panel, and click on "Properties". In the left-hand column of the properties dialogue, select "C/C++ Build". Un-check the box titled "Use default build command". In the box titled "Build command", enter "mbed".
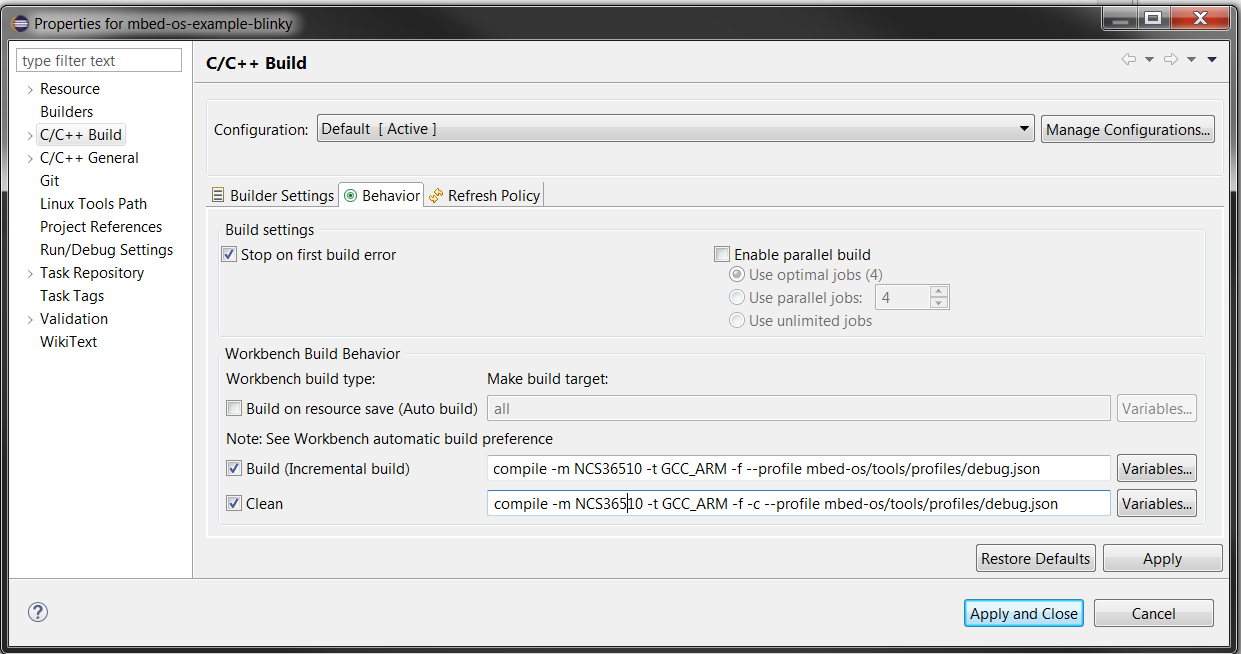
- In the same dialogue as above, navigate to the "Behavior" tab. In the text field titled "Build (Incremental build)", enter "compile -m NCS36510 -t GCC_ARM -f --profiles mbed-os/tools/profiles/debug.json". In the text field below that, enter the same command, with the "-c" flag added after the "-f" flag. The dialogue should appear as shown below. Click apply and close. The mbed project can now be built with the build icon in Eclipse.
Note
The "-f" flag in the mbed build command instructs the mbed CLI toolchain to automatically detect and flash the board. If the NCS36510 board is attached, it will be flashed. If not, flashing will be skipped. If the program was built without the board was attached, and it is desired to flash the board, then simply hit build again after connecting the board - the toolchain will detect the compiled files and skip directly to flashing.
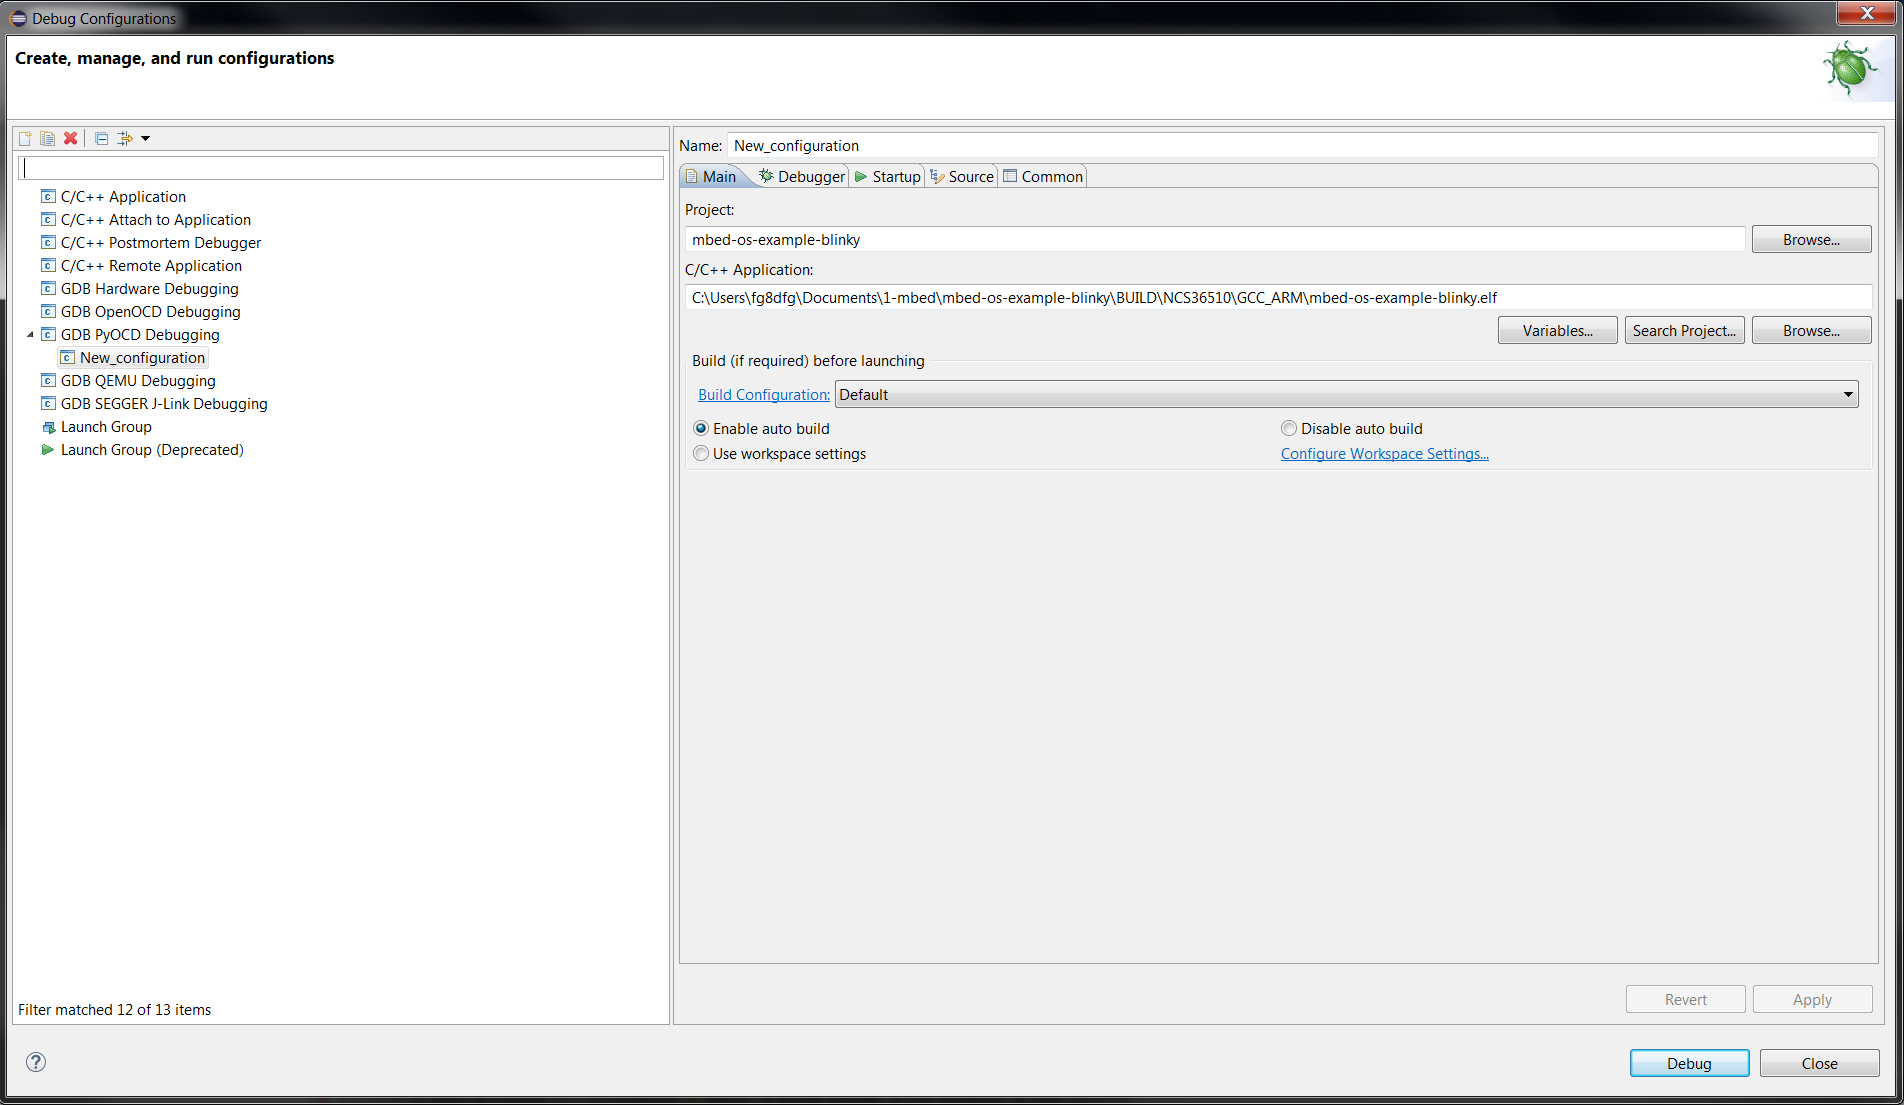
- To set up Eclipse for debugging, navigate to the "Run->Debug Configurations" dialogue. From there, double click "GDB PyOCD Debugging in the left-hand column." A new configuration will be created. Enter the project and .elf file path as shown in the image below:
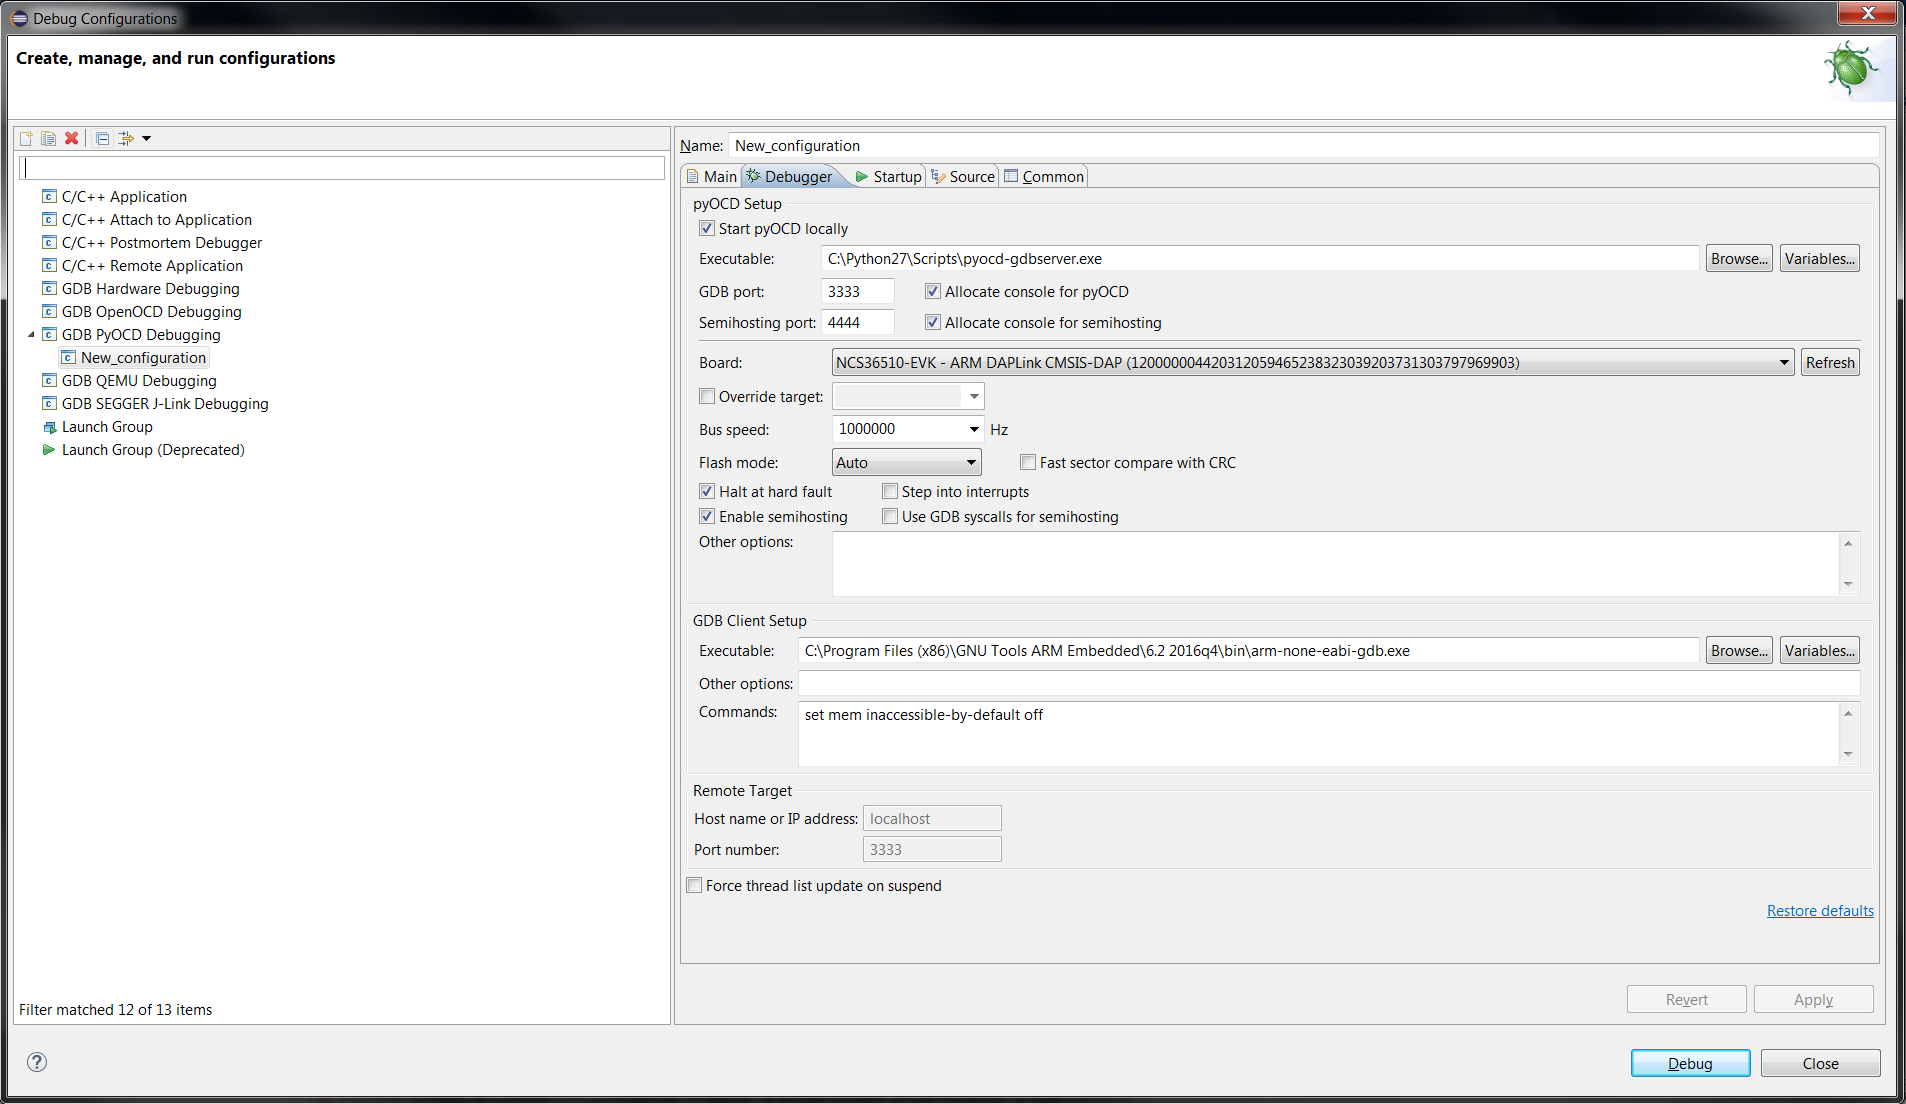
- In the same dialogue as above, click on the "Debugger" tab. Provide paths to the pyocd-gdbserver.exe and arm-none-eabi-gdb.exe executables as shown in the image below.
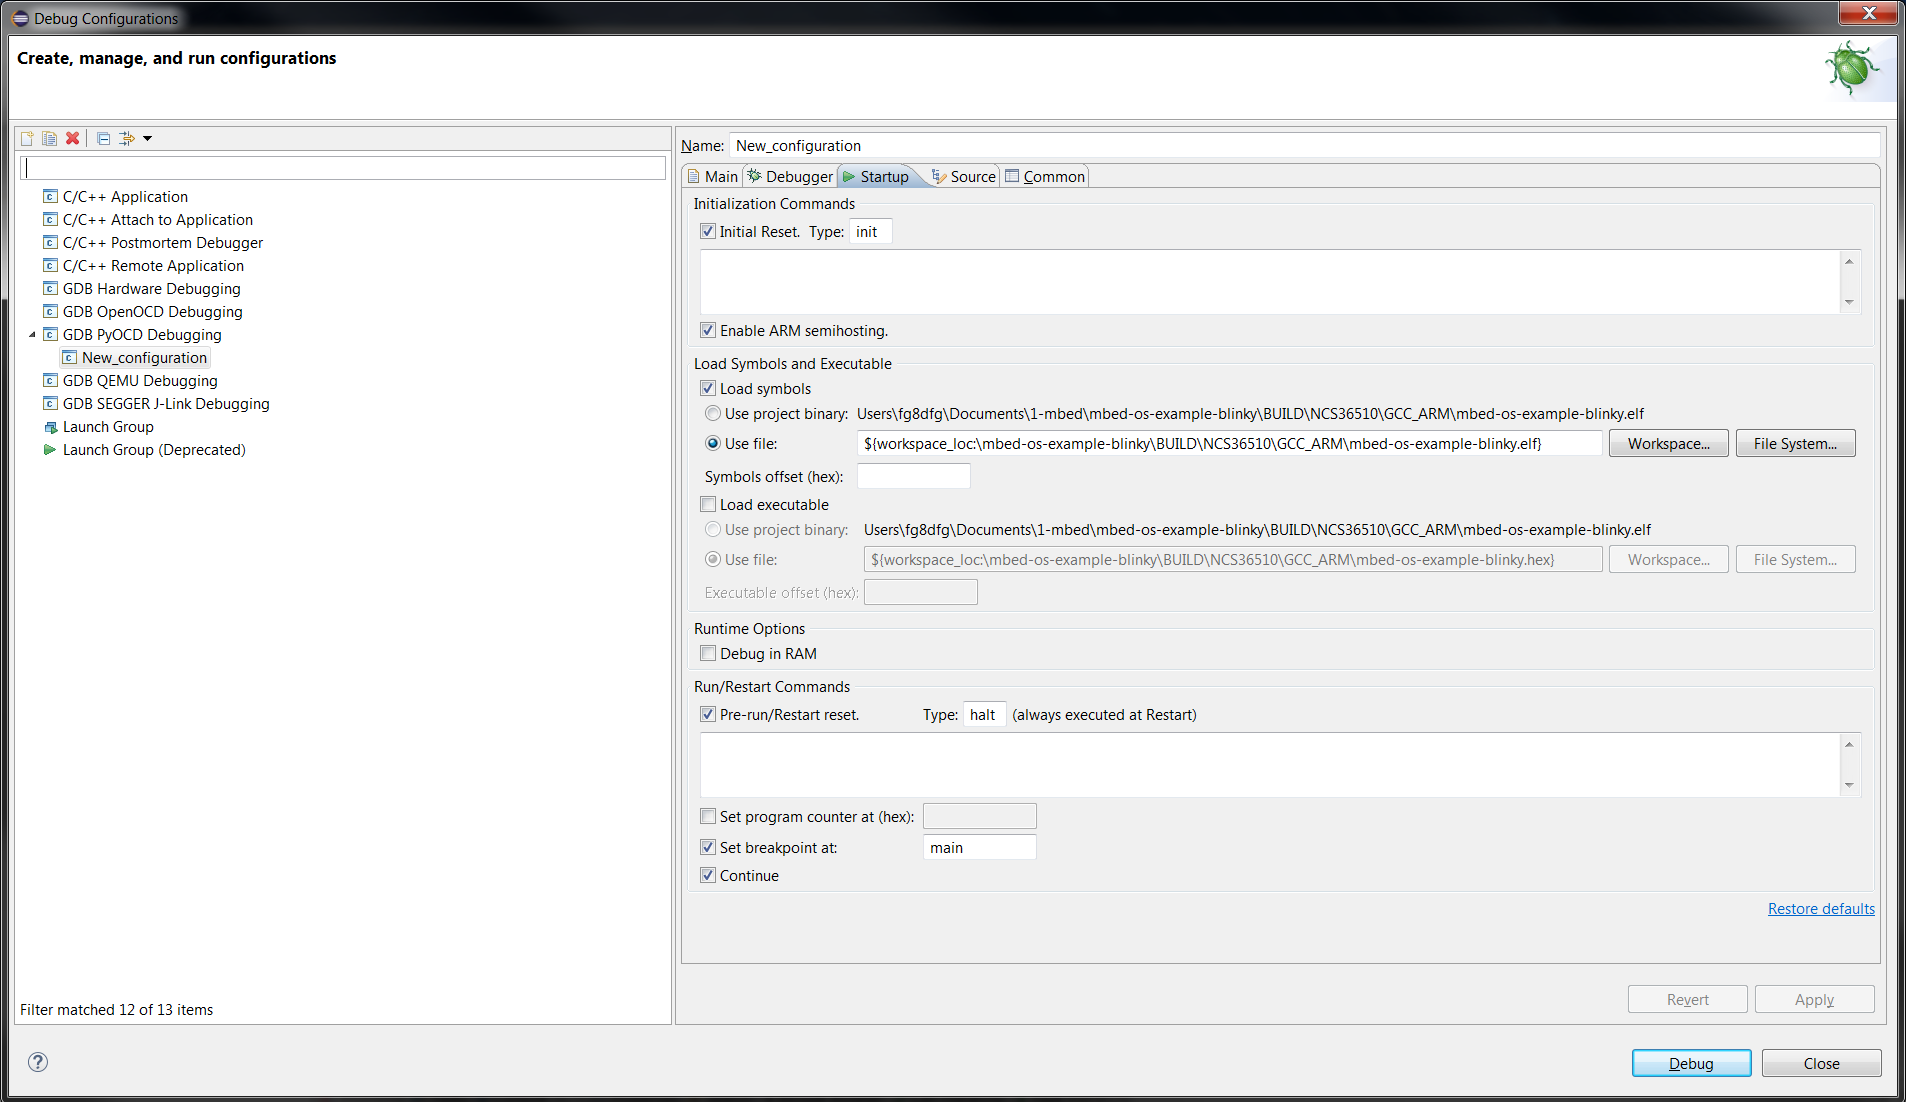
- Move to the "Startup" tab. Make sure that "Load Symbols" is checked, and that it is configured to use the project binary (.elf) file. Make sure that the "Load Executable" is un-checked. At this point, with the board connected, the program can be debugged by clicking on the "Debug" button.
