Renesas
Renesas Electronics Corporation (TSE: 6723), the world's number one supplier of microcontrollers, is a premier supplier of advanced semiconductor solutions including microcontrollers, SoC solutions and a broad range of analog and power devices.
You are viewing an older revision! See the latest version
GR PEACH Getting Started
Information
This page is for GR-PEACH rev.E and GR-PEACH rev.C.
If your GR-PEACH is rev.B, go to Information of GR-PEACH rev.B.
To identify GR-PEACH revision, see here.
Preparation
Install the USB serial communication driver
Only for Windows(R) user:
- Connect GR-PEACH and PC with USB cable which is closer to push switch.
- After the mount GR-PEACH as "MBED" volume label, install this driver.
Register GR-PEACH as your target board
- Check if the root folder of GR-PEACH mass storage drive has "mbed.htm" .
- Open "mbed.htm".
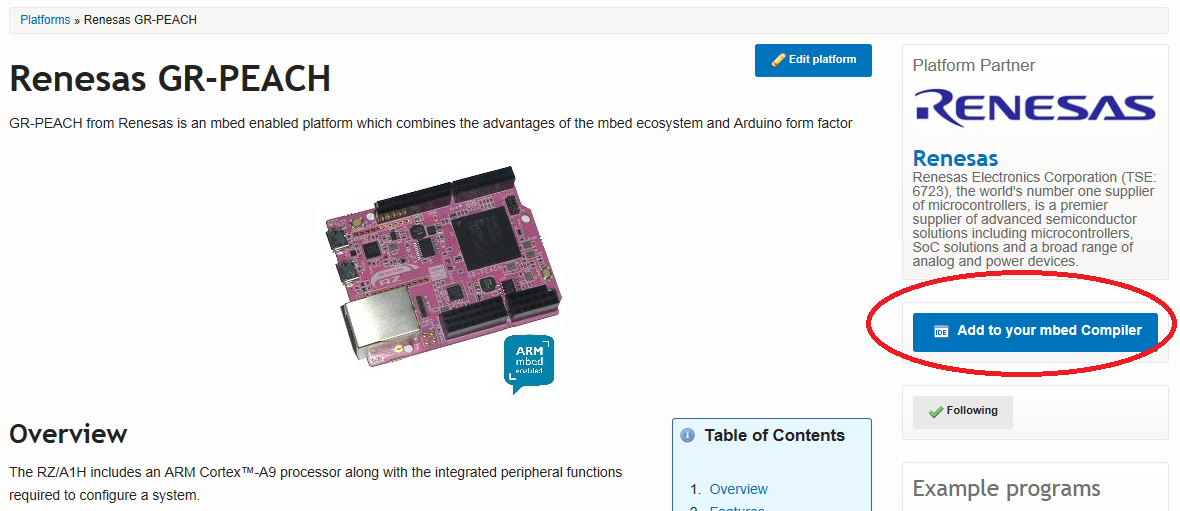
- Click "Add to your compiler" button in "mbed.htm".

Build and Run
Let's blink LED
- Click "import" button of "mbed_blinky" below.
Import programmbed_blinky
The example program for mbed pin-compatible platforms
- Check "Update all libraries to the latest version".
- Get the source code by clicking "Import" button.
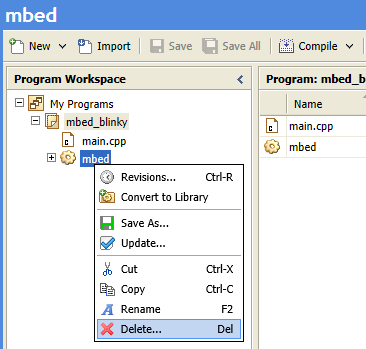
- Select "mbed" library and delete it as shown below.
__Since "mbed lib" was updated from rev.B to rev.C on 2015 Apr 14th, this procedure is not needed now.__

- Import mbed-src rev.C library.
__Since "mbed lib" was updated from rev.B to rev.C on 2015 Apr 14th, this procedure is not needed now.__
Import librarymbed-src_GR-PEACH_rev_c
Please use mbed-src instead of this library.mbed-src supports GR-PEACH rev.C. mbed-srcライブラリをご利用ください。mbed-srcはGR-PEACH rev.Cに対応しています。
- Check "Update all libraries to the latest version".
__Since "mbed lib" was updated from rev.B to rev.C on 2015 Apr 14th, this procedure is not needed now.__
- Get the source code by clicking "Import" button.
__Since "mbed lib" was updated from rev.B to rev.C on 2015 Apr 14th, this procedure is not needed now.__
- Create binary file by clicking the "Compile" button.

- When compile is finished, binary file is downloaded using browser function.
Copy this file to mbed drive.
For Window user: drag and drop.
For Mac user : Refer here - When GR-PEACH's reset button is pushed or reconnect USB cable, the program runs.
Use A/D converter
Follow the procedure of "Let's blink LED". The program to import is below.
Import programAnalogIn-HelloWorld
Hello world program for mbed SDK AnalogIn API
Use Serial Peripheral Interface(SPI)
- Follow the procedure of "Let's blink LED". The program to import is below.
Import programSPI_HelloWorld_Mbed
SPI Hello World
- Before compile, edit main.cpp as below.
A part of main.cpp to delete
SPI spi(p5, p6, p7); // mosi, miso, sclk
DigitalOut cs(p8);
A part of main.cpp to add
SPI spi(D11, D12, D13);   // mosi, miso, sclk
DigitalOut cs(D10);
Use microSD
- Follow the procedure of "Let's blink LED". The program to import is below.
During importing, the dialog appears.**DO NOT CHECK the "Update all libraries to the latest version".**
Because the current version of SDFileSystem, will issue an error when you compile.Import programSDFileSystem_HelloWorld
SD File System Hello World
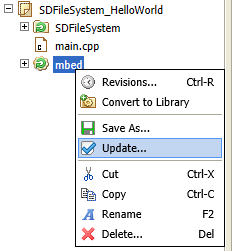
- Update mbed library or mbed library sources(mbed-src or mbed-dev).

- Before compile, edit main.cpp as below.
A part of main.cpp to delete
SDFileSystem sd(p5, p6, p7, p8, "sd"); // the pinout on the mbed Cool Components workshop board
A part of main.cpp to add
SDFileSystem sd(P8_5, P8_6, P8_3, P8_4, "sd");
Use Ethernet
- Follow the procedure of "Let's blink LED". The program to import is below.
Import programTCPSocket_HelloWorld
TCP Socket Hello World with Ethernet
- To specify MAC address, add fllowing function to main.cpp.
Specify MAC address
// set mac address
void mbed_mac_address(char *mac) {
    mac[0] = 0x00;
    mac[1] = 0x02;
    mac[2] = 0xF7;
    mac[3] = 0xF0;
    mac[4] = 0x00;
    mac[5] = 0x00;
}
Use GR-PEACH as USB Device
- Follow the procedure of "Let's blink LED". The program to import is below.
If you want to use a function other a mouse, please see USBDevice page.
Import programUSBMouse_HelloWorld
USBMouse Hello World
- Reference information
Use USB Host
- To supply VBUS, please close JP3.
- Follow the procedure of "Let's blink LED". The program to import is below.
If you want to use a function other a mouse, please see USBHost page.
Import programUSBHostMouse_HelloWorld
USBHostMouse Hello World
- Reference information
Use I2C
- To pull up I2C signals, please close jumpers. Platform page shows which jumper is need to close.
- Follow the procedure of "Let's blink LED". The program to import is below.
Import programI2C_HelloWorld_Mbed
Hello World for I2C
- Before compile, edit main.cpp as below.
A part of main.cpp to delete
I2C i2c(p28, p27);
A part of main.cpp to add
I2C i2c(I2C_SDA, I2C_SCL);


