Infinity Mirror
 Matthew Golino.
0
replies
Matthew Golino.
0
replies


Description
This project is an mbed microcontroller based implementation of an infinity mirror with bluetooth control and audio reactivity. An infinity mirror is an LED light strip placed along the inside edge of a frame in between a regular mirror and a one way mirror. This arrangement allows the lights to bounce back and forth, seemingly forever creating the illusion of going into infinity. Since infinty mirrors are inherently a user experienced based type of project, it was set upon to create the ultimate user experience in controlling the lights. The user can switch between modes of operation or even manually control the colors of the lights from the comfort of their iphone. The various modes include, audio reactivity to a microphone, audio reactivity to an auxiliary cable input (with the ability to pass the sound out to the speakers as well), and manual control of the intensity of each color (RGB) with the ability to set a strobe or flash speed.
Demos: DO NOT WATCH IF SENSITIVE TO FLASHING LIGHTS
Microphone Input Demo:
Aux Input Demo:
iOS App Demo:
iOS App
Icon & Main Screen:
![]() |
|
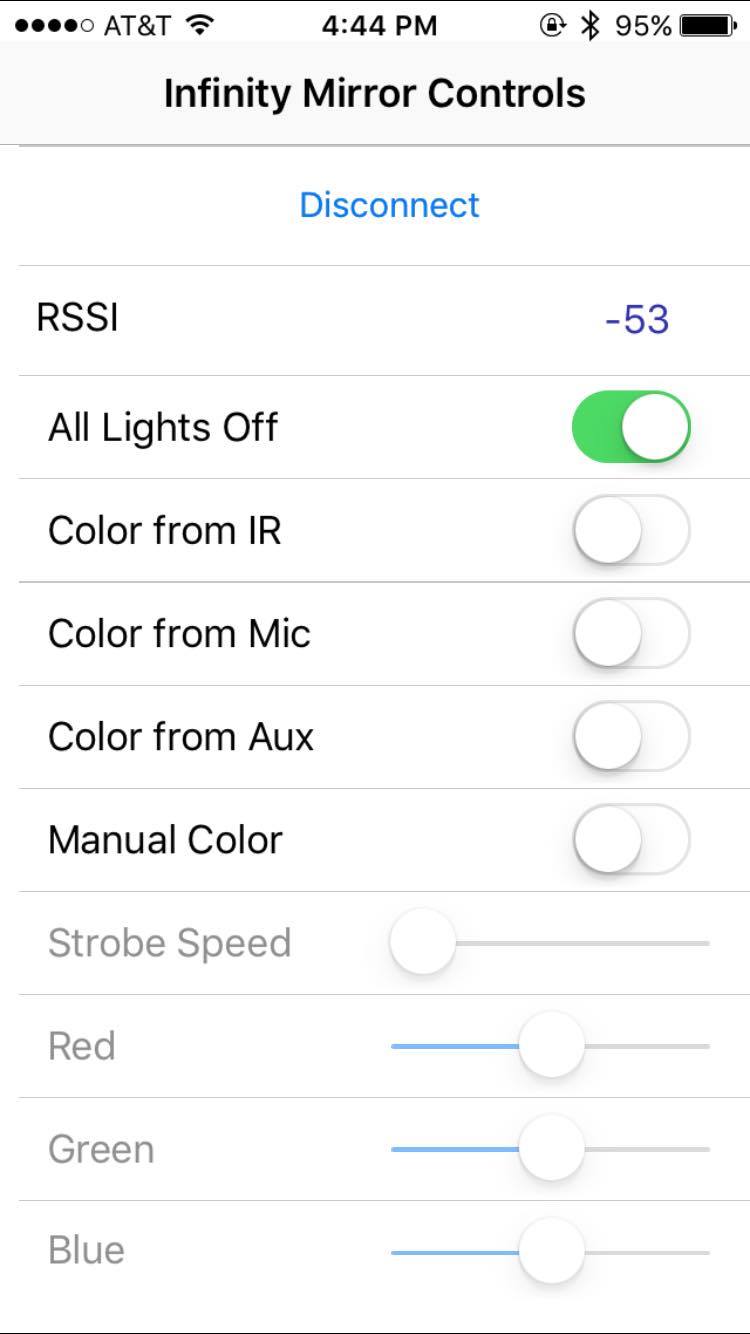
The iOS app was created to act as an interface between an iphone and the Red Bear BLE chip connected to the mbed. The app was modeled after a sample project by Red Bear Labs that can be found here (https://github.com/RedBearLab/iOS), however the infinity mirror version has been expanded to add more controls and communicate more effectively for the specific purpose.
Functionally the app is simply a series of switches and sliders, designed to create a simple and clean user interface. Each time a switch is flipped or a slider is adjusted an array of of 4 separate 2 digit hexidecimal numbers (ranging in value from 0-255) are sent to the mbed. These are interpretted as codes for various functions within the main infinity mirror control code of the app.
Red Bear Labs provided a few basic libraries to help interface with their bluetooth chip from an iphone which made communication easy to treat as simply serial read and writes.
You can find the current version of the app code here on github: https://github.com/mgolino16/Infinity-Mirror-App/tree/master
Audio Reactivity
An important aspect of this project was audio reaction using the mbed's analog input pins. We used an FFT from the cmsis-dsp mbed library to sample the incoming signal. The FFT gave an output array of signal magnitudes as a function of frequency. Three equal sized frequency windows were used to control each LED color (red, green, and blue) to react independently within frequency ranges. The signal magnitudes were averaged within a frequency window to determine relative brightness levels of each LED color against the maximum of the three frequency windows. In order to add color diversity, after 4 seconds the frequency windows reassign which LED they write to. Overall the FFT works extremely effectively to create an audio reactive lighting experience.
Components
1x mbed LPC1768
1x RedBearLab BLE Mini
1x Electret Microphone/MAX4466 Breakout Board
2x 3.5mm Audio Jack Breakout Board
1x Barrel Jack
3x FQP30N06L MOSFETs
1x LED light strip
Wiring the FQP30N06L MOSFETs

Datasheet: https://www.fairchildsemi.com/datasheets/FQ/FQP30N06L.pdf
LED Lights: http://www.amazon.com/LEMONBEST-Water-resistant-300LEDs-Flexible-Controller/dp/B00JTF3LR6
Below is a table showing the pinout for the MOSFETs(Part Number FQP30N06L) and the RGB LED Light Strip. The RGB LED Light Strip is configured as a common anode, therefore the color pin should be attached to the MOSFET's drain. The MOSFET is controlled with PwmOut pins from the mbed.
| mbed | FQP30N06L MOSFET | RGB LED Light Strip | 12V External Supply |
|---|---|---|---|
| P21 | Gate1 | ||
| GND | Source1 | ||
| Drain1 | Blue | ||
| P22 | Gate2 | ||
| GND | Source2 | ||
| Drain2 | Red | ||
| P23 | Gate3 | ||
| GND | Source3 | ||
| Drain3 | Green | ||
| 12V Input | 12V Output | ||
| GND | GND |
Wiring the LM7805 5V Regulator

IMPORTANT APPLICATION NOTE: Use a 0.33uf capacitor to decouple the Regulator's input and a 0.1uf capacitor to decouple the Regulator's output
Datasheet: https://www.sparkfun.com/datasheets/Components/LM7805.pdf
Below is a table showing the pinout for the LM7805 5V Regulator. The 12V External Supply, with a decoupling capacitor, is connected to the input of the 5V Regulator. All grounds and commons should be tied together. The output of the 5V Regulator, with a decoupling capacitor, is used to power the mbed, eliminating the need for a usb cable connection.
| 12V External Supply | LM7805 5V Regulator | mbed |
|---|---|---|
| 12V | Input | |
| GND | Common | GND |
| Ouput | VIN |
Wiring the RedBearLab BLE Mini

Datasheet: http://redbearlab.com/blemini/
Below is a table showing the pinout for the RedBearLab BLE Mini Bluetooth Module. The BLE Mini communicates with the mbed via serial connection. Mbed TX should connect to BLE Mini RX and mbed RX should connect to BLE Mini TX. GND should be connected to the common ground. VIN should be connected to the LM7805 5V Regulator Output.
| mbed | BLE Mini | LM7805 5V Regulator |
|---|---|---|
| TX | RX | |
| RX | TX | |
| GND | GND | |
| VIN | Output |
Wiring the Electret Microphone/MAX4466

Datasheet: https://www.adafruit.com/product/1063
Below is a table showing an example pinout for the Electret Microphone/MAX4466. VCC should be connected to 3.3V. GND should be connected to the common ground. OUT should be connected to an AnalogIn pin on the mbed(p15).
| mbed | Electret Microphone/MAX4466 |
|---|---|
| 3.3V | VCC |
| GND | GND |
| P15 | OUT |
Wiring the 3.5mm Audio Jack

There are two 3.5mm audio jacks, one for the input from an aux cable and one for the output to a speaker.
Connect the RNG and TIP for each jack together, 4 pins in total.
Connect the GND, RSH, and TSH to the mbed ground, 6 pins in total.
Connect a 10uf capacitor at the output jack's TIP pin to ground to decrease ringing noise.

Connect the RNG of the input jack to a DC offset, between the 3.3V mbed output rail and the ground rail. Then connect the output of the DC offset to mbed AnalogIn p20.
Source Code
Future Work and Features
Bluetooth/App
-Heartbeat (is device connected)
-Timeout on individual commands
-Delimiters at start of each command
IR control
Perfboard + 3D printed case
Glass and frame sturdiness improvements
Mounted Speakers
Please log in to post comments.