Seeed XBee Shield V2.0
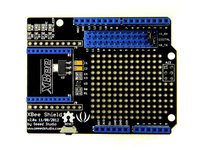
XBee Shield is a standardized and stackable shield. You can easily stack any modules from the Bee series onto it.
Hello World
Import programSeeed_XBee_Shield
Example program for the SeeedStudio XBee Shield V2.0, based on UART serial port connectivity (D0/D1 pins). This program sends "HelloWorld" and prints out the received packets
Library
Import libraryXBee
A library allowing basic functions of the XBEE pro to be used. Currently supported are: Enter/exit config mode, reading device serial number, setting encryption key, writing settings to non volatile memory and sending data strings.
Datasheet
http://www.seeedstudio.com/wiki/File:CJT1117_datasheet.pdfNotes
Introduction
The new version of XBee Shield is a standardized and stackable shield compatible with Arduino. You can easily stack any modules from the Bee series onto it, and build a wireless network for your project. In spite of that, it is also equipped with function of level conversion, which enables a double-way conversion between high& low IO levels. The reserved digital pins facilitate users to select TX/RX port using jumper caps.

Feature
- Standardized shape design
- Can be configured by connecting UartSBee module to USB
- The DIN and DOUT pins can be connected with both UART and other digital pins(D2D12)
- Enlarged space for your own development
- LED indicators
Interface Function

- U2:CJT1117 IC, provides 3.3V voltage for XBee modules.
- U3:SN74LVC1G125 IC, achieves Logic-level translator function.
Usage
If you want to control the XBee module by Arduino/Seeeduino, The XBee Shield is required. Here us the RF Bee as a example for wireless communication. You can also use Bluetooth Bee or other modules.
The steps are listed below:
- 1. Plug XBee Module onto XBee Shield.


- 2. Plug XBee Shield onto Arduino/Seeeduino, connect your Arduino/Seeeduino to the computer via a USB cable to turn it on.
- 3. Use a jumper cap to connect XB_TX and Digital 4. Also, Use a jumper cap to connect XB_RX and Digital 5. Of course you can change the digital port as you like. But don't forget to change the port number in the definition of the demo code at the same time.

Resource
- To get XBee_Shield_V2.0, you can visit http://www.seeedstudio.com/depot/XBee-Shield-V20-p-1375.html?cPath=98_16
- To know more about it , you can visit http://www.seeedstudio.com/wiki/XBee_Shield_V2.0
You need to log in to post a discussion


