SX1590
16 Output I/O Expander
Hello World
Import programSX1509_HelloWorld
Hello world program using the SX1509 Library for controlling a 8x8 LED matrix.
Last commit 21 Oct 2014 by  Jonathan Jones
Library
Import librarySX1509
SX1509 16 Output I/O Expander / LED Driver Library
Last commit 21 Oct 2014 by Jonathan Jones
Datasheet
http://dlnmh9ip6v2uc.cloudfront.net/datasheets/BreakoutBoards/sx1509-breakout.pdfNotes
The SX1509 is a 16 Output I/O Expander that communicates over an I2C bus interface. Additional features of the I/O expander include programmable pull-up/pull-down on all I/O pins, an integrated LED driver interface with 256-step PWM control, and a keypad scanning engine with input debouncers for a matrix of input buttons. A breakout board of the SX1509 can be found at Sparkfun for use with prototyping on a breadboard.
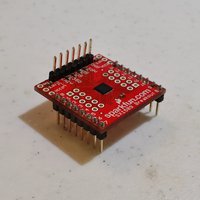
 |
| The SX1509 with header pins |
The Breakout Board
If you are using the same breakout board from Sparkfun as seen in the top image, you may have already had to tackle the problem of adding header pins. In the case of this breakout board, simply soldering standard 0.1" pitch male header pins through all holes will make the board unable to be plugged into a breadboard. One solution to this can be found in the image above.
The list below contains the pin names used for interfacing with the mbed.
| Breakout Board Pins | GND | nRST | SDA | SCL | OSCIO | nINT | Vcc(3.3v) |
| mbed Pins | GND | Not Used | p9 | p10 | Not Used | Not used | Vout |
By looking at the diagram from the SX1509's Datasheet, one will notice 2 user settable address lines (provided below). These are used for providing alternative address if you have need to change it (another chip with same address, multiple SX1509 chips). Regarding the breakout board from Sparkfun, both of these lines are connected to ground, and that translates to an I2C address of 0x3E.
One last thing to note about Sparkfun's schematic for the breakout board is that pull-up resistors are provided for the SDA and SCL. This means no other resistors are needed to setup a functional I2C bus.
There is also a pin named OSCIO on the breakout board that can be used for different applications and programmed to different functions. For most applications, it is not needed and will not be covered here.

LED Control
One can control an LED connected to the SX1509 by using the SX1509::setupLED(LED_t) method from the C++ library. A helloworld program of controlling this interface can be seen below.
Below is a video showing an LED fade in and back out very quickly.
Controlling Matrix of LEDs
Using an LED matrix like the ones that can be found at Sparkfun, one can create their own control interface using the SX1509. A helloworld program is given below that makes use of the library.
 |
| The SX1509 connected with a mbed and LED matrix |
LED Matrix Demo
You need to log in to post a discussion

Tested boards
